I’ve seen several Keezer designs; the majority use chest freezer as a baseline. I strongly considered building one of these, as a hobby wood worker I was looking forward to building a fancy wooden collar. Having been around several chest style Keezer builds there were a couple aspects I did not like. They required more floor surface area, you had to lift the keg up and over the side to load (yes I could have built in a removable section so I would have only had to lift the keg over freezer lip vice collar however I still had to lift it over the lip, your taps are mounted a bit low, cleaning you really need to dig deep to, limited to no additional use storage space inside; so I opted to go with an upright freezer. In addition to accommodating four sixtel kegs, I had shelf space above the kegs & on the door for hops, yeast, the occasional commercial bottled beer, etc. ”Point of note” if you are going to do this you must purchase a freezer which has removable shelves. If the shelves are not removable they are part of the cooling system & your kegs will not fit inside, well OK technically they will; just not upright….
Prior to venturing out to purchase a freezer I did some quick math to calculating just how many square inches of interior space I would need to support 4 Coney kegs; as they measure 8.5” ball-lock, 9” Pin-lock, 9.25” Sankey, I figured a minimal area of 20” square would suffice. With my minimal baseline set I began the hunt, Sears, Lowes, Home Depot, Best Buy and HHGreg all had very similar/comparative models. Sears was running a super sale on the 13.9 CU Foot model (they call it 14 CU foot), plus I found a $50 online additional discount to throw on-top of the sale price, what a country!!
Once it was home I removed the drawers & enough shelves to allow the kegs to sit inside, I only had one shelf remaining and a huge gap between tops of the keg & that shelf, so I created a shelf riser. The riser is two pieces of wood, the base has a plug which goes into the shelf hole, the pegged & riser pieces are glued using wood glue (note the riser block is end grain so you need to pre-coat the end grain with a 50/50 water glue mixture before gluing the two pieces together. Once the wood glue dries both are secured to fridge side using RT6000, a great silicon RTV based glue I’ve used for several wood projects, this stuff is great for gluing different mediums i.e. wood & metal in this case. Oh I also notched the risers & cut the metal shelving to fit.

At this stage was a bit excited, loaded my 4 kegs

(note the camera was crooked wen I took this, the shelf is level & straight

) then discovered the door would not close, damn plastic shelving the in the doors had a real-estate conflict with my 4 kegs. When I took measurements during my shopping phase I failed to account for the space door shelves would occupy when closed. Razor knife to the rescue, I cut away three of the bottom shelves, the plastic material is quite thin; any razor blade would work fine.

I made my cuts just where the plastic began to curve from the flat of the door, this kept the area flush. I sealed the fresh cut plastic all around with aluminum duct tape;
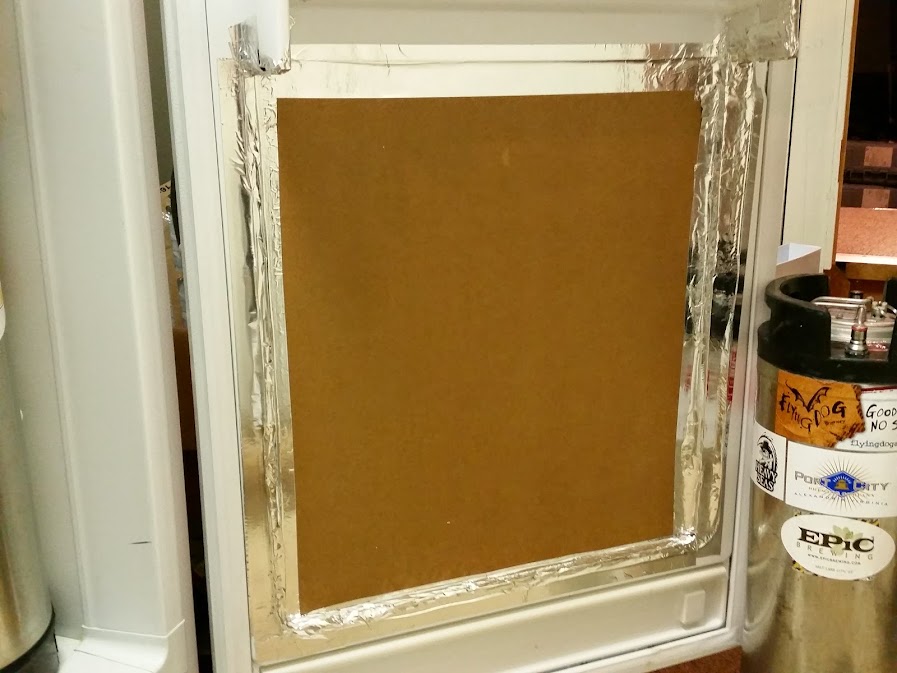
adding a couple chunks of solid core foam board to the vertical risers (for stability),

also added a layer of aluminum insulation bubble wrap stuff to the large surface area.

Now that the door closed it was time to drill door holes for the beer shanks. As I noted earlier this freezer has a controller in the door & I was as not sure where the wires ran. Fortunately I had a tool for that; Fox & the Hound.. Purchased this waaaayyy back when I was station onboard the USS Belleau Wood we had to trace wire runs throughout skin of the ship, this tool was indispensable. By connecting wires underneath with the Fox

(a little transmitter which sends audio signals along the wires) then using the Hound
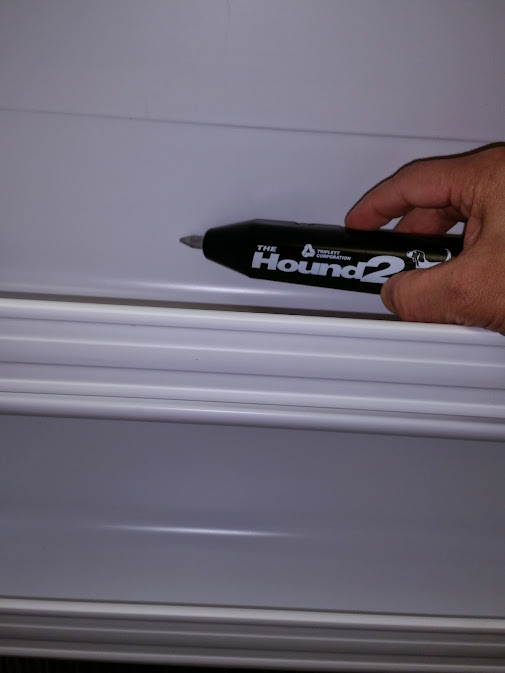
(a little receiver with speaker) you sweep across the door front listening for the tones; which are loudest when the Hound is closest to the wire. Once I knew where wires ran, I could drill through the door with peace of mind ensuring my holes & wires did not meet.
Onto the next drilling session, CO2 lines… The plus side of using a collar on a chest type freezer is you’ll have no issues drilling holes as drilling through the wood collar there is no chance you will drill through a cooling or heating line.
I plugged the beast up allowed it to run about 15 minutes; discovered this freezer has the warm heat exchange lines running along the sides & the cool lines running across the back. Now you could avoid drilling holes for CO2 your tank inside on one of the upper shelves. Initially I was going to install my CO2 tank outside and put my nitro tank inside; installing tank inside required a brace for the upper shelf, which I built. After a beer or two I reconsidered/rethought my initial design & opted to place both gas tanks outside the keezer. Four kegs = four gas lines = four taps; you have to love how the beer math works, three gas lines will be dedicated to CO2 the 4th line, from the exterior could connect to CO2 or Nitro tank; beer genius at its finest… Any need an Oak support shelf brace?
I elected to drill my CO2 lines through the side, to help me narrow just where the heat exchange lines ran I did the corn starch & alcohol slurry test. Sadly the heat is so well distributed it dried at essentially the same rate, no clear lines of distinction i.e. roadmaps of where the lines ran. I ended up with a white chalky exterior, which as it turned out was very helpful. I also fly radio control air planes & helicopters, and one of the cool tools I purchased for this hobby was a red dot infra-red thermometer. Moving the red dot slowly across the exterior in a controlled grid pattern indicated temperature variances of about 8 degrees between hottest & coolest. As you’re moving across the grid the temp will begin a slow rise to peak it then slowly drops off. Distance between hot spots was about 6" inches. I figured the safe zone was the area where temps were the lowest, using my finger I marked a safe area in white corn starch.
With the exterior “safe zone” highlighted I used a strip of blue painters tape to mark inside & using a dremmel with a mini high speed steel tip I created a series of tiny holes, just large enough to allow a hard wire to push through. I used the wire as a probe to verify there were no heat exchange lines in the area I planned to drill ¾” holes for my gas lines.

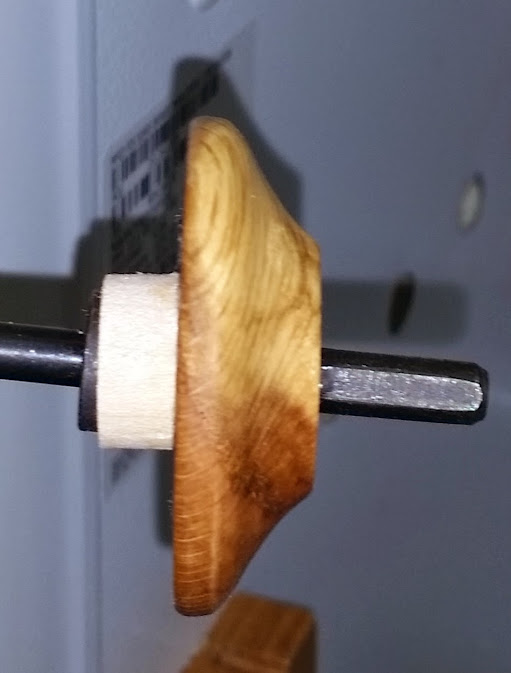
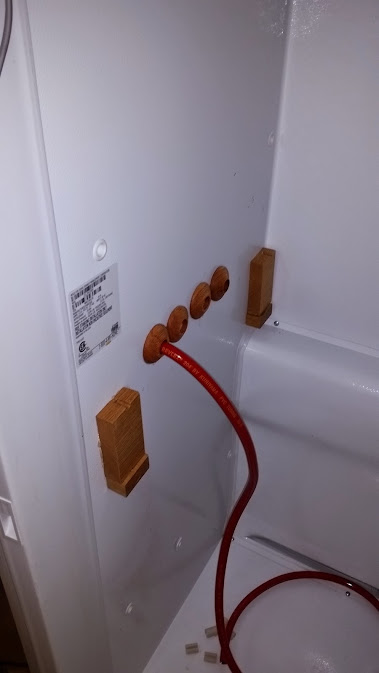
Using a bi-metal holesaw I drilled four ¾” holes through the side. The gas line did not need a full ¾” hole; I was concerned that if I made a hole just large enough for the CO2 line the metal freezer sides would abrade a hole in the rubber line, so I build wooden grommets. These were made from excess Oak flooring boards a good brewing buddy of mine bestowed upon me. Essentially there are two pieces of wood glued together. The inner sleeve has a hole just large enough for the CO2 line, the exterior is ¾”, I’ve included a crude cut away drawing.

Here they are installed.. I have a second set installed on the outside..
Not finished yet here is a rough shot of the front. I need to build my drip tray, I’m replacing the chrome slip rings with brass, Will be adding chalk board markers for beer on tap, also will be replacing the black plastic rings with cocobolo, just wanted to give an idea of what she’ll look like.

 Topic: Upright Keezer build (Read 9249 times)