Thought I'd share notes from today's new build. First of all, this is my first MT build in a long time that is not using a blue Rubbermaid cooler and it hurts just a little bit.
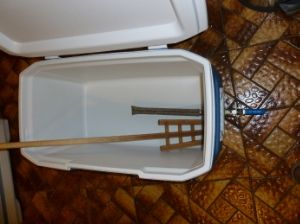
I bought a Coleman Extreme 70 qt rectangular picnic cooler, since it already had a drain hole in the right size and place, since it is a 5-day cooler, because the cooler interior is standard (no weird contours), and since I have seen how popular the Extremes are in the homebrewing community. I do 11 gal batches.
I switched from braid to straight bazooka screen I believe about 8 years ago. It works great.
This build was different than those I did previously, in that I used epoxy putty between the cooler walls to solidly reinforce that area, and to putty in the pipe nipple. This idea was given to me by Maxieboy on NB Forum almost exactly 6 years ago and now is the first chance I've had to try it, since I recently cracked my other smaller MT (inadvertently kicked the ball valve). Maxieboy, if you're out there, THANKS! This thing appears to be basically bulletproof, meaning built to last, with no leaks or rot at all.
Photos follow but here's how it went today, with excellent results:
1) I used a 2 1/2" long, 1/2" ID pipe nipple, not shown in the photo, which worked just right with my materials.
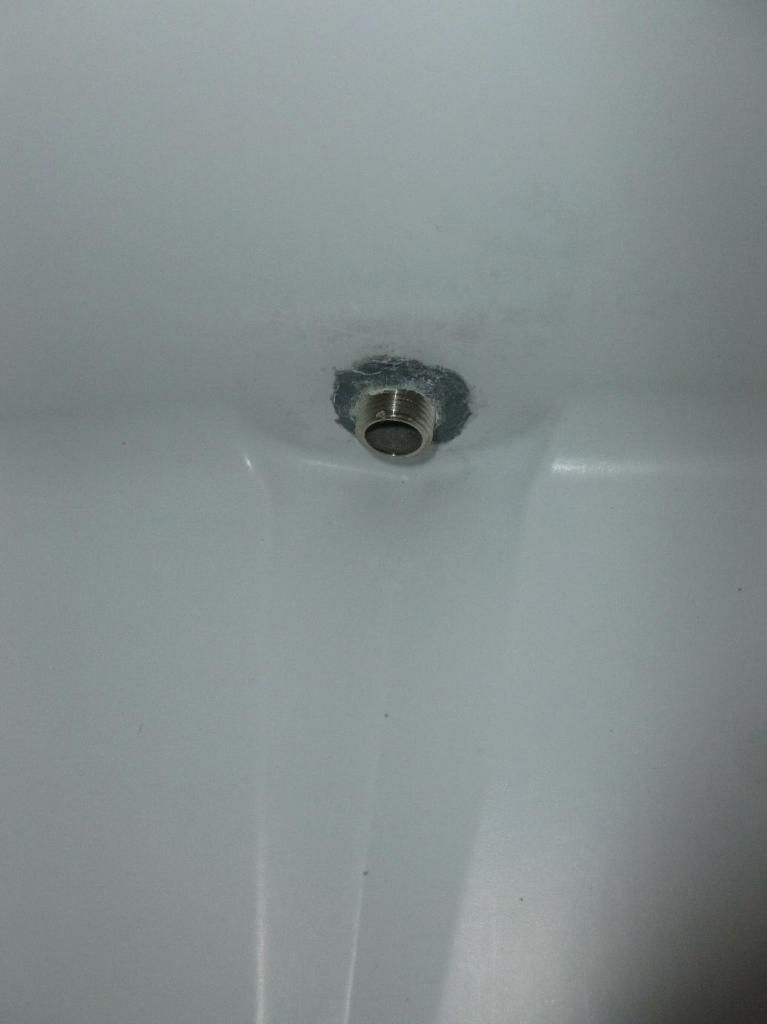
2) After removing the drain plug, using a long, slender, small head screwdriver, my finger, and a dust buster, I removed ~2.5" insulating foam all the way around the hole, and it took some time and care, especially since I also scraped the inside walls bare of sprayed foam in this circumference, to create a bonding surface. 2" would have been plenty, and would have required a bit less putty.
3) After thinking about it and sight-testing it, I realized that I would need more of the pipe nipple and pipe threads on the outside of the cooler, less on the inside.
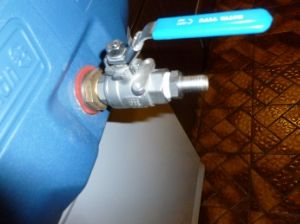
4) I screwed the ball valve all the way onto one end of the loose pipe nipple, and marked the top of the pipe with magic marker as the "up" position when installed.
5) I wrapped the pipe nipple threads with masking tape everywhere I planned not to have putty, transferring the "up" mark onto the tape.
6) I kneaded and then stuffed epoxy putty (check Home Depot/other HW store plumbing section) to completely, firmly fill the cavity. I used the Rectorseal brand, at $3.81 per tube. It took seven 2-ounce tubes. Look for the more economical 4-ounce size. I had underestimated and originally bought only three tubes so had to run back to the store mid-project. After kneading, you only have 2 - 3 minutes to work the putty before it QUICKLY sets hard -- it sets to like steel in 15 to 20 minutes.
7) immediately after packing the cavity with putty, I used what I needed of what was left to pack a little collar of putty around the exposed outside of the pipe nipple up to the tape.
8 ) I stuffed the putty-wrapped pipe into the hole, removed the excess, and using my finger quickly packed a little more putty into the remaining outside crack, inside and outside of the cooler where the pipe protruded.
9) again quickly, I pulled off the masking tape before the putty smeared onto it had a chance to set hard.
10) an hour later I tightened down my silicone washers backed by SS washers, and bazooka screen inside, and brass nut outside. The silicone washers cover the hardened residue of putty. Also, although not really needed to prevent leakage (the putty does that by itself), the silicone washer/SS washer/nuts balance each side with equal opposing pressure, so there' not constant pressure on the hardened putty.
11) There's plenty of room on either side of the bazooka screen to stir with my mash paddle without hitting the screen.
Rectorseal Epoxy Putty MSDS:
http://ows.rectorseal.com/product-data/epoxy-putty/RectorSeal%20EP200%20EP400%20Epoxy%20Putty.html


 Topic: New batch sparge picnic cooler mashtun build (Read 1228 times)