I finished making my cooler to use for fermentation. The last 12 hours I have been doing a test run with a carboy full of 5 gallons of water. It got down to 66-65 pretty quickly and without touching it or making any changes it hasn't gone back above 65 since 11 this morning. The coldest it reached was 64. My house temp is set at 73. This was with 4 20oz frozen bottles in it.
It was inspired by euge, who posted his old version in another thread. He used a 30 gallon tote with buckets. But I looked all over and couldn't find one big enough to hold a 6 gallon carboy and be able to put the lid on. Here are the pics-
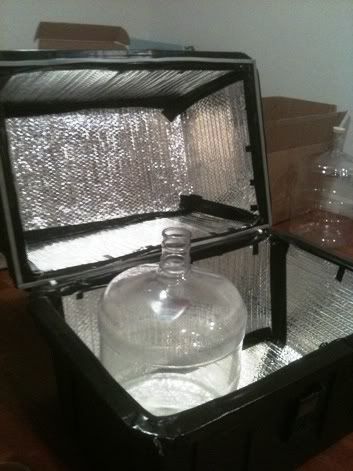
Opened Up:
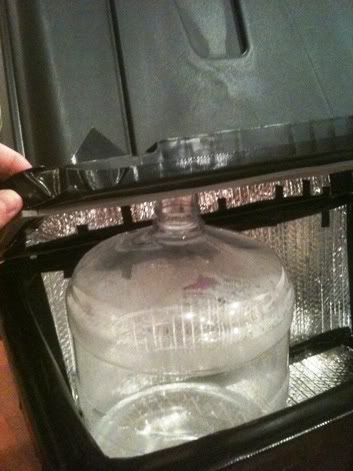
Closing:
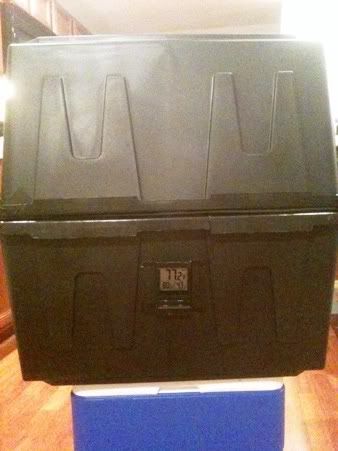
The front while closed:
These totes were way to small individually, but they were sold in a 2pk at Lowes for $22. One placed on top of another was perfect for the carboy without leaving too much free airspace up top.
I put 1/2" thick insulation board on the bottom of both totes, so one for the bottom and for the top of the cooler, it cost $11, and I used maybe half of the large sheet you buy. I outlined the entire interior with reflectix from Lowes for $13. I put a thin strip of styrofoam tape around the top half which was $3-$4.
I taped a digital indoor/outdoor thermometer from Radio Shack ($15, but you can probably find it cheaper) to the bottom tote and ran the cord inside and taped it to the side of the carboy so its not touching the bottom of the cooler.
Luckily, the totes have 3 oval shape holes on each of the long-sides which obviously line up when stacked. I got a few feet of rope cut into 3 pieces to create a "hinge" on the back holes, so I can easily lift the front open instead of taking the entire top off. Also, tying them tight help seal it up. To top it off I just put a little weight on top (1 gallon jug of water) to help the styrofoam tape seal up the opening.
At 11 this morning I put in 4 20oz bottles of frozen water. It was around 64 most of the day, and in the 12th hour of being closed the temp slowly rose to 65. I figure anywhere between 64-66 will be good by me. I'm going to see how much longer it takes to get between 66-67. But the 12-hour window is ideal to switch it out twice a day.
Note:
In the pics there isn't a carboy stopper and airlock in, but there was one while doing the test run.
Also, the cooler isn't tall enough by maybe 1/2"-3/4" to use a buble airlock. It might work if you skipped the insulation board.
 Topic: My Take at the DIY Fermentation Cooler (Read 2730 times)