This week’s system comes to us from Mike, a member of the American Homebrewers Association, as well as a member of the San Antonio Cerveceros. This was Mikes first keezer build and it came out absolutely beautiful. Here is Mike’s description of the whole process.
After going through the painstaking process of bottling several batches of homebrew, I quickly became ready to start kegging my beers, thus Barley’s Bar was born. Named after my dog and number one brewing assistant, Barley’s Bar is a rolling two-tap keezer, trimmed with hardwood and tile.
I began by building a rolling base for a 7.2 cf chest freezer. I enclosed the freezer with front and side panels cut from a 4’x8’ sheet of cabinet grade Red Oak, using wood glue and finishing nails to attach the panels to the base. I then attached the Red Oak base molding along the bottom edge. I added a 1” thick x 4.5” wide strip of Red Oak to create the top rail and used a router on one edge to make a cut to match the crown molding. Next, I attached top rail and crown molding to the top of the cabinet using glue and finishing nails.
To attach the bar top to the lid of the freezer, I created a base built out of ½” plywood. After sanding the freezer lid, I used a strong construction adhesive like liquid nails to attach the plywood. I surrounded the lid with Red Oak peanut rail to create the bar feel, and used the left over pieces of Red Oak from the cabinet to in-circle the area for the tile, drip tray and tower. I then attached a tile backer, installed the drip tray, and drilled a hole for the tower. I then stained all the wood and applied a clear coat. Next, I set and grouted the tile, after deciding on a pleasing pattern. Finally, I attached the two tap tower to the lid.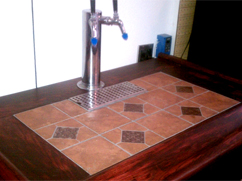
For refrigeration control, I used a digital Johnson Controls regulator. Caution must be observed when drilling into the back side of the freezer, as refrigeration lines run throughout all of the freezer walls. I decided to drill the hole for the regulator next to the hole for hinge screw, because there was most likely not a refrigeration line in that area. I drilled through only the outer shell of the freezer, and carved through the foam until I got to the back wall of the freezer, where I poked a small hole through.
On the inside of the freezer, I put the thermostat probe in an old yeast vial with water so that it would regulate the liquid temperature and not the air temperature. This step may not have been needed, as I have discovered that there is not that much difference between the two. The freezer will hold four 5 gallon kegs and a CO2 tank with a 2 pressure regulator which allows me to carbonate and serve at the same time. It also has room for a few craft beers that I save for special occasions. In the future, I can swap the tower out for a few 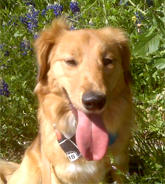 more serving taps.
This system came out absolutely awesome! This was Mikes first attempt at a keezer and we can only imagine what other great brew projects Mike has instore for the future. Cheers to you Mike, and your Assistant Brewer Barley!
Mike Farringer is a proud member of the American Homebrewers Association and the San Antonio Cerveceros. Please visit them at http://www.facebook.com/sanantoniocerveceros.
If you’ve got a pimped out system of your own share it in on the AHA Forum under the Pimp My System category. Don’t be bashful; show off your creativity! Who knows, you could be the next star of Pimp my System…
The AHA Forum is communications central for the homebrewing community. Draw upon the collective knowledge of homebrewers around the world to get your questions answered. Help out your fellow homebrewers with their questions.


Share Post