
Henry Neilson, an engineering grad student with a knack for DIY projects and an enthusiasm to get others homebrewing, shared his custom grain mill with us. Check it!
Inspiration
After brewing all-grain batches for quite some time, it was frustrating to buy grain on a recipe by recipe basis and wait for it to be milled by my local homebrew shop. I wanted to be able to streamline my brew days, which meant cutting out any steps I could. I’ve had great success with other DIY projects in the past, so I began researching how to build a grain mill. I knew I could save a lot of money by buying grain in bulk and milling it myself. The cost of a new grain mill, which I found to be $100 and up, was out of the question, so I designed and built my own.
Grain Mill Construction & Materials
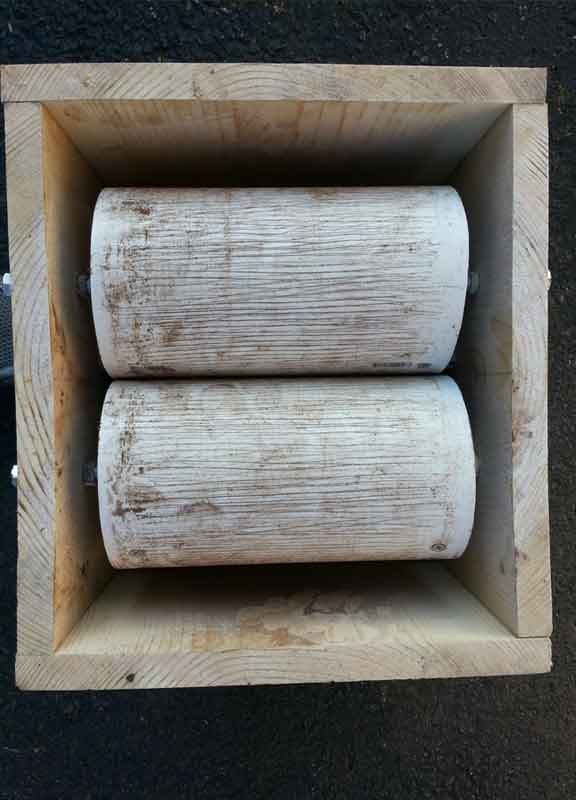
I wanted to use readily available materials without relying on machinery (as that would defeat the point of frugality), which ruled out using any metal. I made the rollers out of 4″ PVC pipe and the body and hopper were made from wood due to ease of construction. I made circular cutouts that fitted the insides of the pipe lengths.
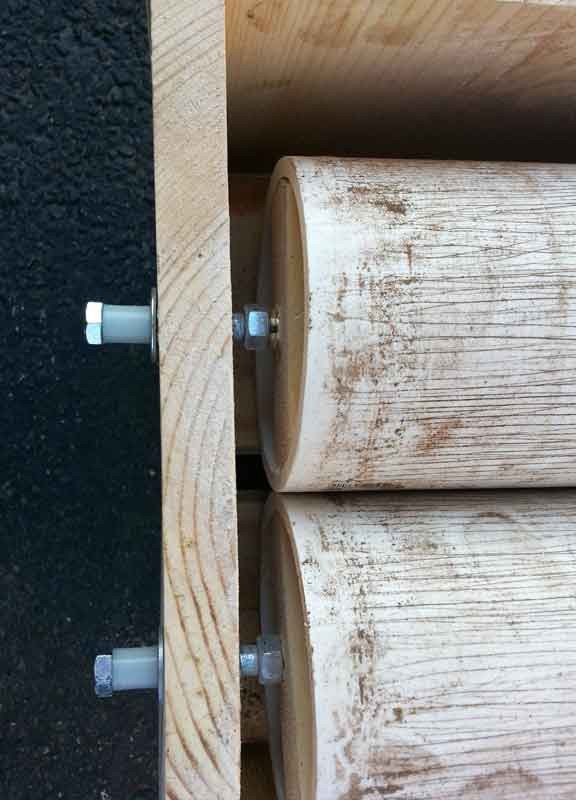
 First, cut four 8″ x 12″ pieces from the board. Attach these together to make the outer frame. Make sure to mark the center lines on the longer length of the frame. Drill holes for the axle bolts 2.27″ from the center, and 2.5″ from the bottom of the frame. This will give you a 0.04″ gap; you’ll likely need to fiddle with these as the frame is wood.
Next, cut four 3-7/8″ long piece of wood and push them into the ends of the PVC pipes. This allows you to attach the axles to the PVC pipes. Attach each wood piece to the PVC pipe using four countersunk wood screws, with the screws located about 1/2″ from the edge of the pipe. Make sure all the screw heads are flush or even below the surface of the PVC pipe. Drill 1/2″ holes through each end block, making sure that these holes are centered with respect to the PVC pipe, and not the center of the wood block.
Assemble the rollers with the hardware in the following order: end of the bolt, plastic spacer, washer, bronze bushing, nut threaded to end of threads, tap handle adapter attached to roller. You’ll more than likely have to adjust the rollers to remove any eccentricity, which can take time.
 Finally, assemble the hopper to go on top of the mill by using the rest of the wood.
Materials List
- (1) 24″ length of 4″ ID PVC (do not purchase sewer-rated pipe as the walls are too thin. Cut the PVC pipe into two equal lengths)
- (1) 4′ x 10″x1″ board
- 3/8″ plywood, about 2′ x 4′ in length (Use for the hopper)
- (4) oil impregnated brass bushings 3/8″ ID
- Either 4 x 3″ x 3/8″ bolts; or 2 x 10″ x 3/8″ bolts
- Assorted 3/8″ washers or spacers
- (8) 3/8″ nuts or (4) 3/8″ nylon locking nuts
- Drill with driver socket
- Sandpaper
- Circular/miter saw
- Hand saw or knife
- Wood or drywall screws (1-5/8″)
- 3/8″ tap handle fittings
Notes: Although the walls of the PVC pipe are about 1/4″ thick, they still tend to bow with enough weight. I fixed this problem by either filling the center of the tubes with some sort of concrete/hardening putty, or by adding a number of internal cutouts to minimize the bowing. You may also want to rough up the outside surface of the pipes to ensure grains don’t slip away while milling. There is is no belt on the rollers. There is enough friction between the grains and rollers that forces the second roller to start turning. Total cost was about $30.
Function
Well, it’s a grain mill, so it mills grain. I get about 68% efficiency with this mill. It takes about two minutes to get through about 10 pounds of grain.
To use the mill, you’ll need to hook a drill to the end of the bolts with a driver socket. Turn on the drill to start spinning the rollers (PVC pipe) and then add your grain.


Share Post