This article on bokashi grains is the You Can Ferment That! column from the May/June 2023 Zymurgy magazine.
By Amahl Turczyn
This installment of You Can Ferment That! is a slight departure—bokashi is not a fermented food product, but rather a method of fermenting compost. With spring in the air, there’s no better time to start composting food, your brewery waste, and food scraps. The ancient Japanese technique of bokashi diverts all kinds of organic waste from the landfill and into fertile soil for gardens, yards, or potted plants. It’s not only hailed for its space savings, but also for its adaptability to a wide variety of waste—many things that are not allowed in traditional aerobic compost bins work fine with anaerobic bokashi composting. It’s also much better smelling than aerobic composting. There is still an odor, but it’s tart and lactic rather than downright rotten.
Food items are packed tightly into a bin with a lid at the top and drainage holes at the bottom, and a compost accelerant known as bokashi bran or bokashi grain is added with each new addition of food scraps. The grains are loaded with lactic acid bacteria (LAB) and other “effective microorganisms” (EM) to kickstart the fermentation process, lower pH quickly, and keep odors and pests at bay. The result is an acidic “leachate” that emerges from the bottom of the bin, which can be diluted and used as plant food. Within a matter of weeks, depending upon ambient temperatures and the type of food scraps in the bin, the compost is greatly reduced in volume and moisture content, and breaks down enough that it can either be composted with another method, or buried in the yard to become food for worms and, eventually, fertile soil for plants.
One can purchase dedicated bokashi composters online, as well as the grains—for all its benefits, though, this can get expensive, since you need a continual supply of the grains to keep the process going. For enterprising homebrewers, there are ways of mitigating the running costs, though: making your own bokashi composter, for example, and producing your own bokashi grains.
Still have that Charlie Papazian Zap-Pap lauter tun kicking around? It makes a perfect composter. An old, lidded bucket with holes drilled in the bottom works as well. Brew all-grain beers at home? Spent grains are a perfect source of bran for making bokashi grains, if you know how to inoculate them with EM and then dry them for storage. Even if you’re not going to launch into your own home bokashi composting regime, or you don’t have the time or space to garden, there are still perks to making your own LAB-infused grains.
Why Ferment Your Spent Grains?
For one thing, to reiterate: they don’t stink. I’m sure you’ve smelled rotting spent grains—they are a prime source for all manner of bacteria and mold, and after a hot summer brew day, they become septic and smelly very quickly. If inoculated and fermented properly, LAB-infused spent grains smell tart and bready, like sourdough starter. (This is no surprise, since a great source of EM comes from the sourdough culture in your fridge that you use for baking bread. If you don’t have a culture going currently, you can have one up and running fairly quickly—see You Can Ferment That! in the May/June 2020 issue of Zymurgy.)
For another thing, if you are a regular and prolific brewer, or even a small-scale professional nano- or microbrewer, converting your spent grains to bokashi bran can be a lucrative endeavor. With just a bit of extra work and space, you can produce a dried, LAB-infused product gardeners and farmers will pay good money for, all while keeping it out of the landfill (and cows), thus reducing greenhouse gas production. Even if you can’t sell it outright, it can make for a great partnership between your brewery operation and the local food co-op or community garden. With so many breweries churning out great beer these days, brewery solid waste disposal has become an issue, and many have turned to bokashi as a solution.
Other Effective Microorganisms
While LAB is the workhorse behind bokashi composting, it’s not always the only EM involved. Yeast usually accompanies the LAB, and any strains that are present in your sourdough culture, wild or domesticated, work just fine as bokashi EM.
Purple non-sulfurous bacteria (PNSB) is a family of highly adaptable microorganisms known to produce compounds that are nutritious for plants, and they will happily flourish in the anaerobic composting bin. Their presence isn’t strictly necessary, but they do have the nifty ability to metabolize ammonia and hydrogen sulfide, so in addition to quickly converting your compost into plant food, they also cut down on odor. However, you will have to find a separate source for them if you want to add their beneficial presence to your soured spent-grain bran—they don’t typically live in sourdough starters.
Companies can be found online that produce a concentrated liquid that includes PNSB, but it is often expensive. The good news is even a small bottle lasts a long time, and under the right conditions you can use this concentrate as a seed culture when you make bokashi bran. PNSB thrives within a wide range of pHs and temperatures, and it grows in the presence of light and in darkness. It really is a jack of all trades.
Because you are trying to encourage yeast and bacteria, it’s good to add a food source to your bokashi bran. There already is some sugar in spent grain, so adding more isn’t strictly necessary, but a bit of molasses or sugar mixed in with your spent brewery grains and sourdough seed culture will kickstart EM growth on the barley and help it act faster when introduced to food waste in the compost bin.
Finally, you can add a third class of EM: mold. While white mold growth on the bokashi grains towards the end of fermentation is a good sign (green, blue and black molds mean you should dump the batch and start over), Aspergillus oryzae, or koji—the same beneficial mold use to ferment sake, miso, and several other food products—will also grow on your spent grain. Koji is especially useful as a bokashi EM addition if your food scraps contain a lot of starch, as the amylase will make quick work of pasta, bread, rice, or other grains. (Technically, you can grow pure-culture koji mold on sterilized spent grains in an incubator with the correct time, temperature, and humidity and then use those grains to make sake, but that’s a fairly elaborate process that’s better left for another ferment.) If you want to just add koji to your bokashi cocktail of EM, which will include lots of LAB if you’re pulling wet spent grain directly from the mash tun, simply sprinkle some koji-kin spores on the grains along with your other seed cultures.
Putting it All Together
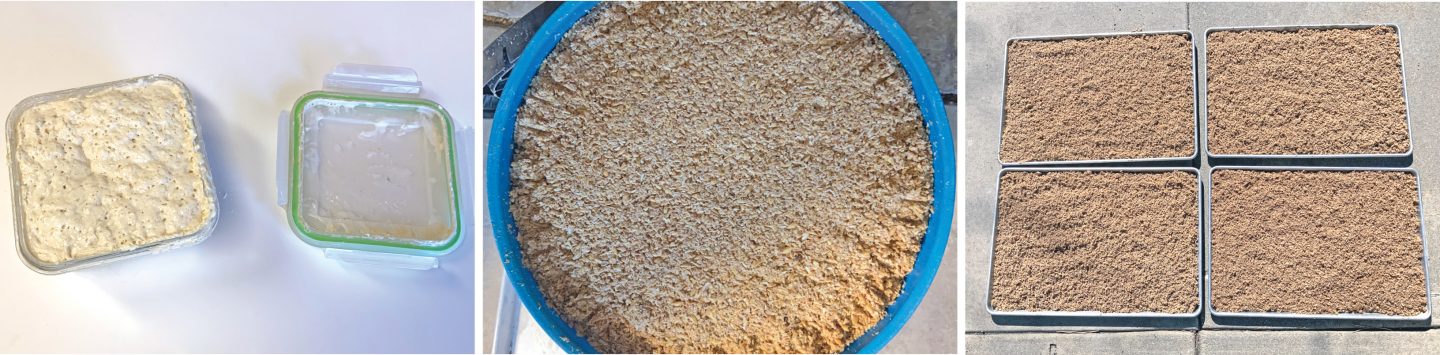
The basic procedure is to wait until after you’ve sparged an all-grain batch of beer, and then have your seed cultures ready to inoculate the spent grain. Your “fermenter” can be a specialized bokashi bin or, as mentioned, a brewing bucket with small holes drilled in the bottom for drainage. You will also need a clean trough or tray to mix up the batch. Once your spent grains have drained, spread them out in the mixing vessel. You don’t want them sopping wet, so the more liquid you can press out, the better.
Once the average temperature of your moist grains is at about 100°F (38°C), you can begin mixing in the sourdough culture, PNSB culture (if using), koji-kin (if using) and sugar solution (if using). Using your bare hands for this is fine. Shoot for at least ¼ cup (60 mL) active starter and about a teaspoon (5 mL) of the other EM cultures, per packed gallon (4 liters) of spent grains. Once mixed thoroughly, press the inoculated grains into your fermentation vessel and cover tightly.
As with any lacto fermentation, the less oxygen present, the better. You could probably bleed a layer of CO₂ or nitrogen over the grains, but to be honest, it’s not going to prevent air ingress for very long. Just compress the grain as much as possible, place the bucket in a tray to collect the leachate that will seep out, and cover the bucket tightly. The sealed vessel can then be set out in the sun to stay warm, or you can keep it in a hot shed or garage. There will be a tart, sourdough aroma that will intensify as LAB and other EM take hold; although not unpleasant, it may not be something you want indoors.
Optimally, you want to maintain 90° to 110°F (32° to 43°C) for two to three weeks, so it’s great to do this during the warm summer months, but it turns out that the process is pretty forgiving. You can ferment in the colder winter months as well, but it will obviously take longer. One advantage to winter grain ferments, depending upon where you live, is fewer insects. Fruit flies are going to be itching to get into that grain and do their thing, so tying a fine mesh bag around the whole vessel may be necessary to keep them out.
After a couple of weeks, open the fermenter and inspect the grains. With ideal levels of warmth, you should see fine, white mold on the top, and the grain should have a tart, bready, lactic smell. A bit of a white-glue aroma is OK, too, but you don’t want rotten grain aromas or, as mentioned, black, green, or blue mold. Dig down into the grain bed to check that the sourdough smell, grain color, and grain texture are consistent throughout the batch. If so, you can proceed to the next step—drying the grains. What you don’t want is to find dark, rotten, or moldy patches in the grain. If you’ve mixed in the cultures thoroughly, this should not be an issue.
Drying Bokashi Grain
If you are doing a small batch, say a gallon or so, you can use a food dehydrator to dry your bokashi grains. This is preferable, because you should be able to control the temperature; about 120°F (49°C) is the maximum you should use to dry the grains. You’ll also be able to dry relatively quickly and avoid insect or other pest incursions.
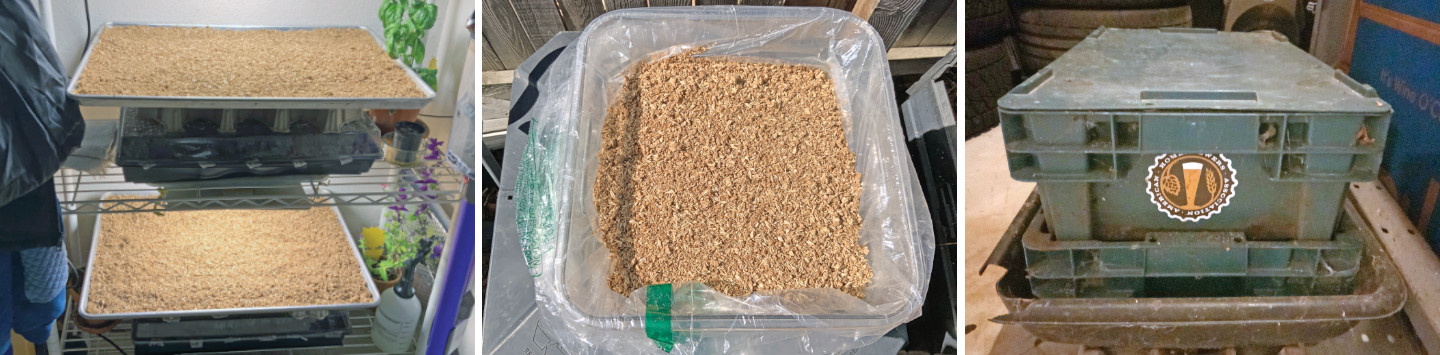
If you live in a relatively arid climate, you may want to use a more passive approach to drying—spreading the grain out about an inch thick in shallow pans or on screens works great if you have an area that gets full sun most of the day. Yes, you’ll get flies, birds, and perhaps squirrels looking for a free meal, but this is for compost anyway. Turn the grains once a day for a few days, breaking up any lumps so that everything dries thoroughly. When completely desiccated, simply seal up the grains in an airtight container and keep it on hand near your compost.
Most animals have no interest in bokashi grains, but if you have raccoons in your area, you might want to keep your dried grains indoors—for some reason, raccoons seem to find the idea of eating dry, sour grain appealing and will make a huge mess if they can get into it.
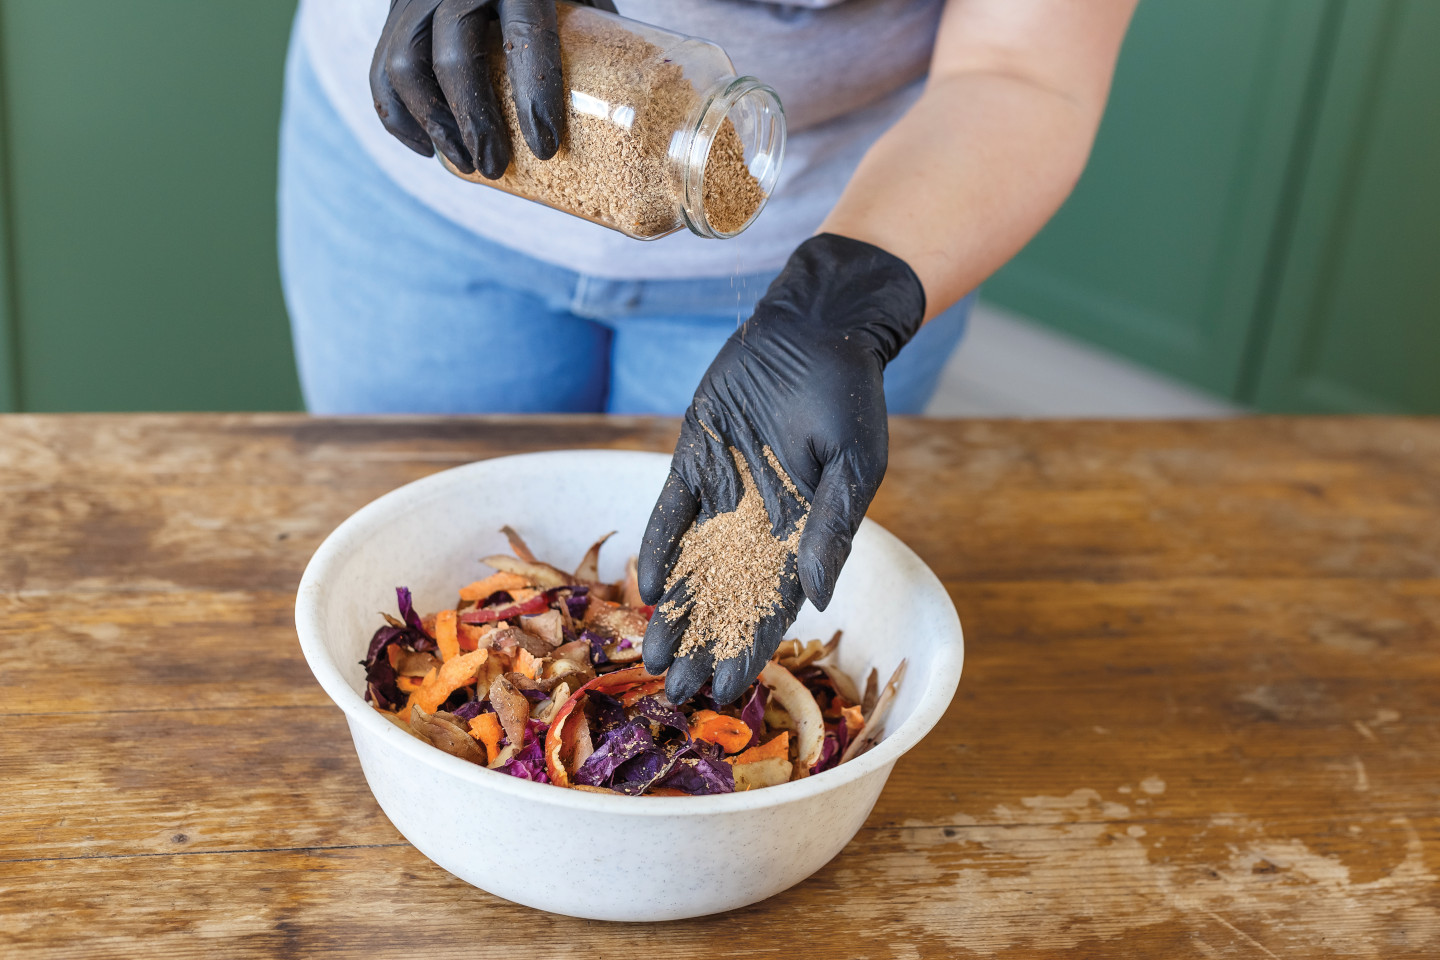
Every time you add food scraps, paper, egg shells, or whatever to your anaerobic compost bin, sprinkle the waste liberally with your homemade bokashi grains, and very soon they will lose water weight and break down into a low-odor, acidic compost.
Note that bokashi works with just about any waste. With aerobic compost bins, any fats, meat, bones, and oils aren’t really allowed. If you do worm composting, sometimes called vermiculture, allowed waste is even more restrictive, as worms generally don’t like citrus peels, starches, and alliums (onions) in addition to the waste mentioned above. Fruit is discouraged, just because it invites fruit flies. Worms do like paper, cardboard, dryer lint, and egg shells. All of these are fine for bokashi, however. Some people even add pet waste to their bokashi, but this is not recommended if the resulting soil will be used to fertilize edible plants, fruit trees, vegetables, etc., because of the possibility of disease transmission.
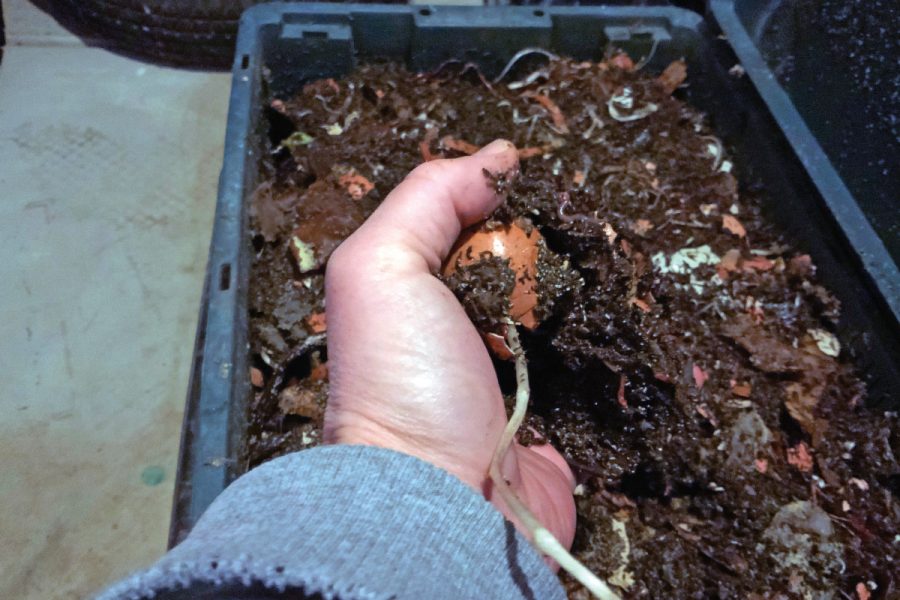
When your bin is full, you can either transfer the stuff to an aerobic composter along with leaves and lawnmower clippings, or you can introduce it to your worm bin for further breakdown. The worms don’t seem to mind the low pH, and they do a good job breaking down what’s left of the bokashi waste into usable castings that can then be directly dug into your soil. A third option would be to bury the stuff in a corner of the yard and let worms and other organisms in your soil finish the process. Either way, you’ll be setting up your lawn, houseplants or garden with fertile, top-quality soil, and finding a clean, eco-friendly way to dispose of brewery waste.
Amahl Turczyn is associate editor of Zymurgy.
Share Post