
Aimee Garlit is one of five Off-Centered Quality Technician at Dogfish Head Craft Brewery and holds a PhD in Microbiology and Immunology. She has been a homebrewer since 2008 and served on the American Homebrewers Association Governing Committee.
We asked her to share some homebrew tips from the perspective of a commercial brewery lab technician, and here’s what she said.
The opinions expressed in this article are Aimee’s alone and do not represent the opinions of Dogfish Head.
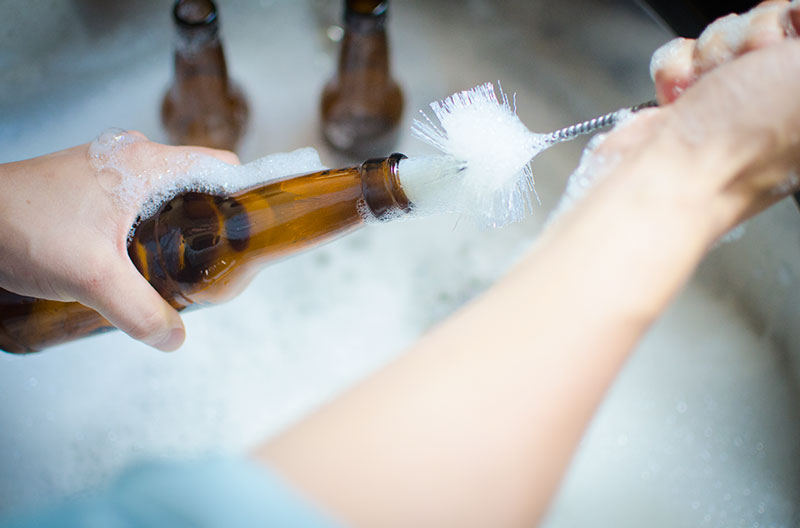
1. Thorough Cleaning and Sanitation are Vital
As a brewery microbiologist, this is my number one piece of advice–whether you’re brewing five gallons at a time or 5,000. It’s important to make sure the only microorganisms in your beer are the ones you want to be there. Whether that’s a pure culture of an American ale yeast strain for an IPA or a blend of strains for a Belgian saison, unwanted visitors can wreak havoc on your beer. These contaminants can be in the form of bacteria or wild yeast and can produce off-flavors ranging from buttery diacetyl to plastic-like phenolics to sourness, just to name a few.
Don’t take shortcuts with cleaning–the sooner you clean after brewing, the easier it will be. That said, cleaned and sanitized are not the same thing. Cleaners like PBW and oxiclean are generally great at scrubbing off “crud,” but will not give you a microbe-free surface. For that, a sanitizer like Iodophor or Star San should be used once the item is clean. Note that these products will not completely sterilize something (for that you’d need an autoclave or some pretty harsh chemicals), but theywill sanitize it and make it suitable for brewing. Plastic parts (tubing, racking canes, buckets, etc.) should be replaced periodically, or after they become scratched or worn.
In the unfortunate event that your beer does become contaminated, these off-flavors generally intensify over time. Some contaminants will consume sugars that brewer’s yeast cannot, producing more carbon dioxide and causing gushers. My advice? If you catch the contamination early and can tolerate the off-flavor–drink it quickly. Otherwise, cut your losses and dump the batch.
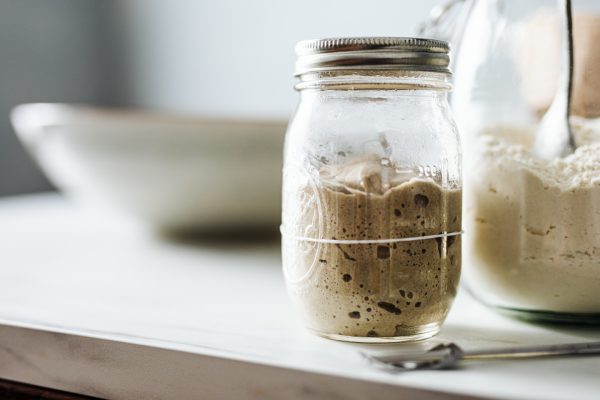
2. Healthy Yeast Make the Best Tasting Beer

Photo © www.johnjohnstoncreative.com
Here’s another favorite topic of mine–yeast! Now that we’ve discussed how to keep unwanted bugs out of your beer, let’s talk about the ones who will be doing the heavy lifting.
The freshest possible yeast should always be used, as it will have the highest viability. Many homebrewers use pitch-ready vials or smack packs for their beers. These are very convenient, and they will usually work fine for lower alcohol brews. However, for beers over 5 percent ABV or so, they generally will not contain enough viable cells to start a robust fermentation quickly. There are several calculators available to determine the right pitch rate for your specific beer (www.mrmalty.com is a good example).
To reach an adequate number of cells, you can use one of two approaches: purchasing multiple units of yeast or creating a starter. The latter will give you a greater proportion of viable yeast in your pitch, so I recommend that option. If you have canning equipment, you can even prepare wort for several starters in one day–just mix up your extract and water, split into jars, and pop them in the pressure cooker. This way, future starters will be even simpler to get going. Once your starter has shown some activity and you’re ready to brew, crash the yeast out by refrigerating it for an hour or two. This will allow you to pour off some of the spent liquid, leaving behind the pitchable slurry.
3. Oxygen Can Be Your Best Friend or Your Worst Enemy
Just like humans, yeast (at the beginning stages of fermentation, anyway) need oxygen to live. Well-oxygenated wort provides a hospitable environment to pitch your yeast into and will help create the robust fermentation I discussed in tip two. I’ve heard of multiple techniques for introducing oxygen, from shaking the hell out of the carboy to using an aeration stone, and I’m sure there are others. As long as it introduces oxygen without contaminating your brew, it’ll work!
On the flip side, oxygen should be kept out of finished beer as much as possible. The presence of oxygen in kegged or bottled beer will make your beer age much more quickly, robbing it of its pleasant aromas, and in the worst case, replacing them with the scent of wet cardboard. To avoid introduction of oxygen, purge kegs with carbon dioxide before filling, and avoid splashing while racking or bottling. Oxygen barrier caps are a good investment for beers that will be consumed within a few months of packaging; for beers you intend to age, try a wax seal to really keep oxygen out.
4. Sensory Evaluations Will Help Dial in Your Process
 I think the most important reason to homebrew is to brew something that you simply enjoy drinking, whether it’s paired with a tasty meal, shared with friends, or quaffed while watching football on a weekend afternoon (or all of the above!). However, taking some time to really dissect out the flavor components of your brew can help you learn more about the process of brewing and make your next beer even better. Formal training, such as judging education through the BJCP or use of an off-flavor kit, can certainly be helpful but is not necessary.
At many commercial breweries, a sensory panel is conducted in the morning, before your palate has become fatigued by heavy or spicy foods. For your next brew, try tasting your finished product in a similar environment–on its own, in a snifter if you have one. Take the time to look at and smell the beer, and jot down some impressions of it before you taste it. Next, taste the beer, using all parts of your mouth and thinking about the different flavors and sensations present. How does the beer come together as a whole? Are there any aromas or flavors present you weren’t expecting? Is there something missing?
If your beer vocabulary is still basic, put these aromas and flavors into terms you’re familiar with (e.g. fruity, bready, buttery, etc.). If something seems out of place or off, consult a trusted brewing resource to see how you can address the issue. It’s much easier to diagnose a potential issue if you can describe it correctly, rather than just saying that the beer is “off” or “not great.”

5. Use the Highest Quality Ingredients Possible
To me, brewing is a lot like another of my favorite hobbies, cooking. To a certain degree, you get out what you put in. You can brew a pale ale using some old malt extract you got on sale and some hops you’ve had in a clear bag in your fridge for a couple of years, but it won’t taste nearly as good as one you made with fresh malt and well-stored hops.
I prefer to shop at local small businesses that I know rotate their stock frequently, but I realize that this option isn’t available everywhere. In many instances, a large online retailer is the best bet. If you do shop in person, pay attention to the ingredients and overall condition of the shop. Does it seem busy? Do the ingredients look fresh? Are the hops and yeast properly stored? You may need to spend a bit more to get the quality of ingredients that you want, but in the end, it will be worth it!
Share Post