While there are multiple ways to grow yeast in a starter, one of the most effective is to use a stir plate. Stir plates utilize magnetic attraction to create a vortex inside a container of wort, keeping the yeast in suspension and providing oxygen—which are both crucial to healthy yeast cell growth and replication. Similar results can be achieved by intermittently shaking a starter, but a stir plate is proven to result in greater yeast growth.
There are many different stir plates available from homebrew shops, but they can also be made fairly affordably. Many of the parts can likely be sourced around the house, and the rest easily purchased. As with most DIY projects, you can be as fancy or frugal as you please.
Project Materials
- Box: A box is needed to house the electrical components and hold the starter vessel. Almost anything with a flat surface will do. Old gaming systems, internet routers, cigar boxes—even Tupperware will work. Make sure whatever you select can hold the weight of your anticipated starter volume.
- Fan: Most DIY stir plates use fans from retired computers, but these fans can also be purchased from an electronics store for relatively cheap. A magnet is attached to the fan, which will rotate the magnetic stir bar inside the starter to create a vortex.
- Rare earth magnets: These sound more intimidating than they really are. Rare earth magnets can be harvested from an old computer hard drive, or you can find them at an electronics store. This magnet will be attached to the fan.
- Rheostat: A rheostat is used to control the speed of the fan, and ultimately the speed of the vortex in the starter. You may be able to salvage one from an old household electronic, or you can get a new from an electronics or hardware store.
- DC power source: DC power sources are the most common energy sources in electronics, so if you have an old charger for a cellphone, video camera, computer or something similar you should be all set. If not, a DC power source can be purchased from the electronics or hardware store.
On/off switch: A switch can be harvested from just about any electronic with an on/off switch. Some rheostats have built in on/off switches. - Magnetic stir bar: This is the one required piece that you probably do not have on hand at home. Most homebrew shops will have them available in various sizes. The rare earth magnet attached to the computer fan will rapidly rotate the stir bar, creating the vortex in the wort.
- Jumper wires: You might need a few extra wires depending on how complex you are planning to make your stir plate. These wires can be purchased or harvested from old electronics.
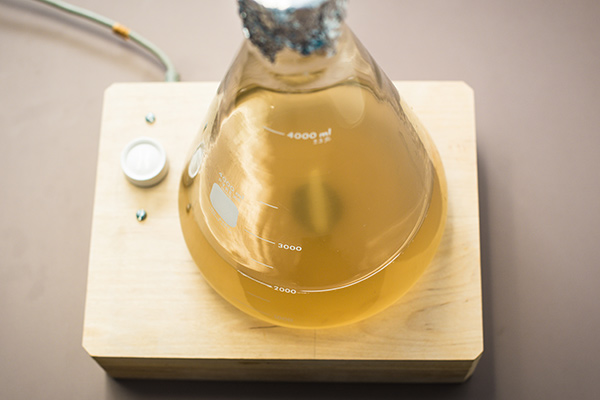
- Starter vessel: While this is not actually a part of the stir plate, when making a starter you will need a vessel to contain the starter wort. The ideal vessel is an Erlenmeyer flask, but a growler or mason jar would also work. They key to choosing a starter vessel when using a stir plate is finding something with a flat bottom that will not hinder the movement of the magnetic stir bar.
Construction
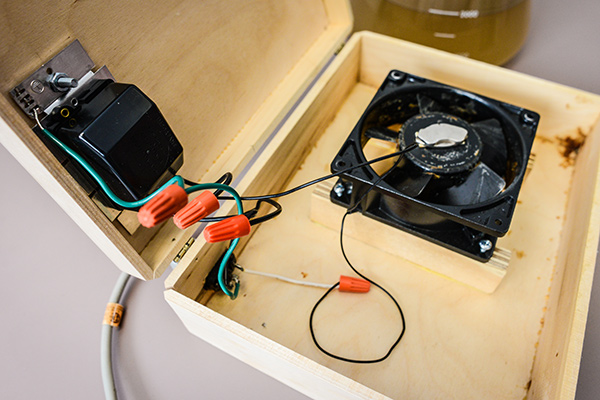 Start by centering the fan inside the box you selected. Secure the fan to the base using screws or super glue, taking care not to hinder the movement of the fan.
Once the fan is fixed to the base, take one or two of the rare earth magnets and center them in the middle of the fan. They should magnetically fix to the center, but if they don’t, they can be secured with super glue.
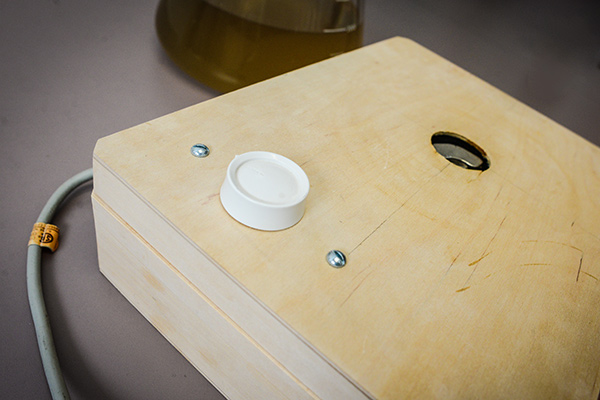 Drill small holes through the box to secure the on/off switch. Do the same if using a rheostat.
Now it’s time to wire the stir plate and bring it to life. While this can be done at home, there is always a danger involved when working with electricity. It is best to consult an electrician.
The fan should have two wires, one red and one black. The red wire is typically the positive and the black wire the negative. These two wires can be connected directly to the DC power source, but the speed produced will likely be more than what is necessary for a yeast starter.
To control the speed of the vortex, connect the negative black wire to the DC power supply, then connect the other wire from the power supply to the on/off switch.
Connect the positive (red) wire to the rheostat, then complete the circuit using an additional jumper wire connecting the switch and the rheostat.
Plug in the power supply and test your connections. If the fan does not power on, double check to make sure the positive and negative wires are in the right place.
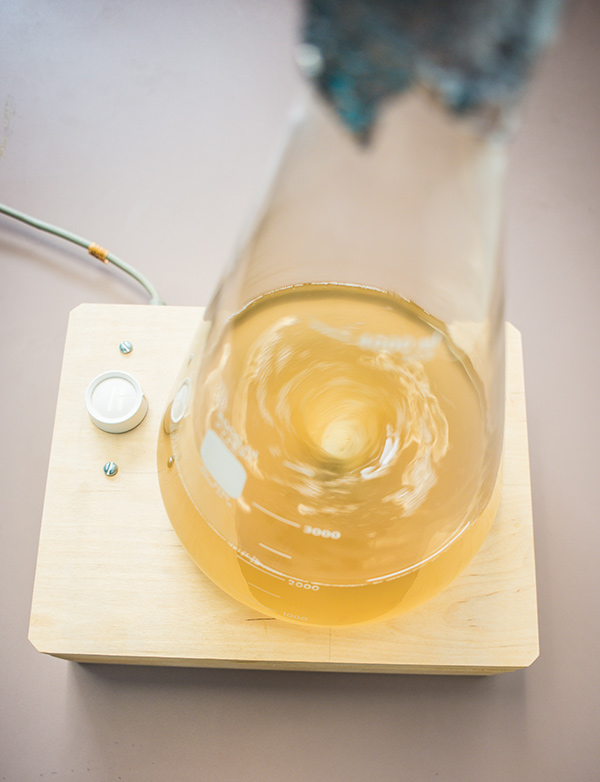
 Once the stir plate is functioning with the ability to control the speed of the fan, seal/close the box containing the electrical components. As a test, fill the flat-bottomed starter vessel to a typical volume you will be working with and gently add the magnetic stir bar.
The magnetic connection between the rare earth magnet mounted on the fan and the stir bar inside the starter vessel will cause the stir bar to rotate as fast as the fan spins, creating a vortex inside the vessel. This vortex will keep the yeast in suspension and provide oxygen as you propagate the starter.
There you have it—one homemade stir plate!
Brendan Witt was an intern for the American Homebrewers Association.
Share Post