Styles, as a whole, are a difficult topic within the beer world. Constantly changing, ever-evolving, and hard to pin down exactly, beer styles are a topic of much debate in brewing circles. Passionate pleas on the true definition of a saison versus a farmhouse ale have been made by brewers over many a pint. The nuanced differences between various nationality-based pilsners can be debated until the cows come home. One thing that leaves little room for debate, however, is the explosion of “clean” sour beers in recent history and the overall lack of stylistic structure to contain methods of producing them.
Sure, we can talk in excruciating detail about what exactly defines a spontaneously fermented beer or what makes a lambic different from a “methode traditionelle” beer, but that kind of talk does little to help brewers understand the differences in pre-boil (aka clean) sours brewed with fermented fruit, unfermented fruit, hops, or otherwise. It is for this very lack of language and ability to talk about clean sours in a consistent way that the existence of the Midwest Fruit Tart has its origins.
What’s a Midwest Fruit Tart Beer?
Let’s first start by explaining what a Midwest Fruit Tart is exactly, as this up-and-coming style is just starting to take off.
By the numbers, a Midwest Fruit Tart has an ABV in the range of 7.5–9.0%, a fruiting rate of 2.5–3 lbs/gal, and a relative pH of 3.2–3.4 (a titratable acidity, or TA, between 10–20 is normal, depending on the fruit). The fruit is co-fermented with the wort to relative dryness (unlike the also-popular “slushy” beers, which are defined by their characteristic sweetness from unfermented fruit) with a finishing gravity usually around 1.012–1.015.
The beer should be extremely clean, with no funk from wild yeasts or bacteria, and the fermentation character should be clean with a light to moderate ester character acceptable. IBUs range between 15 and 25, depending on the fruit and desired flavor intensity. No hop aroma or flavor should be present. The goal here is to highlight the fruit, first and foremost. The bitterness is purely for balance in tandem with the acidity. The malt character should be minimal as well, and a simple base of 2-row should suffice. If more malt character is desired, then mixing base malts, or even going with a 100% Vienna malt mash can give a more toasty back-end impression that blends well with the jammy fruit characteristic of the beer. Up to 5%–10% dextrose or table sugar can also be used to help keep the beer dry and push the ABV higher without impacting the mouthfeel or flavor of the beer (this process is called chaptalization in winemaking). A touch of vanilla can also help round all the flavors together and soften the acidity—aim for 0.1g per gallon as a starting point. You don’t want to taste the vanilla as vanilla, but rather are looking for it to bring everything together “behind the scenes” so to speak.
In short, a Midwest Fruit Tart is a celebration of fermented fruit in a glass. Recipe design considerations all revolve around improving and highlighting the natural flavors found in the fruit you choose to use.
Fermentation Considerations
A proper Midwest Fruit Tart beer undergoes a two-stage fermentation process: an initial acidification step that happens pre-boil, and then a second yeast fermentation post-boil. There are a couple of key considerations in achieving the cleanest (in the sense of flavor i.e. not funky) possible sour beers.
- Use a pure lactobacillus culture. Don’t use grain, don’t use yogurt, don’t use a GoodBelly. Use a pure culture from a trusted supplier.
- Sour at the lowest temperature your culture will allow. We aim for no higher than 85°F (29°C) and have also had great success as low as 75°F (24°C). Stalling can occur below 70°F (21°C). We use a proprietary lactobacillus strain that we found and isolated, however L. plantarum gives similar results at similar temperatures.
- Use a fermentation vessel to acidify your wort. Oxygen is the enemy at this stage, and your mash tun or boil kettle won’t cut it.
- Make sure to use proper nutrients! Lactobacillus requires manganese to work effectively (brewer’s yeast does not). It also uses a fair amount of zinc. So long as you’re not adapting this process for a sour seltzer, the grain should have enough of these nutrients, otherwise seek out some additives.
- You should see your gravity change only slightly over the 2–3 days it takes to acidify. A change of more than a couple points could indicate unwanted yeast contamination.
For your brewer’s yeast fermentation step, I highly recommend any of the popular kveik strains available. They can take the abuse, and at this point, your soured wort is a challenging environment. Here are our keys to success with a soured wort fermentation:
- Don’t repitch yeast. This includes using a pitch from any prior batches, including non-sour ferments. We’ve seen yeast’s ability to attenuate drop rapidly when repitched after fermenting in low pH environments.
- If possible, make a yeast starter at the same target pH of your wort (aim for 3.4–3.5). Use any food grade acid you have available to you, ideally lactic, but phosphoric, citric, and even malic can work.
- Use more yeast than you normally would. Look to overpitch your sour by about 2x the normal rate of non-sour ale ferments.
- Avoid English strains. We’ve had bad luck with off-flavor development and under-attenuation. Kveik is recommended. American Ale yeasts do a good job as a backup. I have had good success with lager strains as well.
- Make sure to add yeast nutrients again after the sour fermentation step.
- Add your fruit the day after high krausen, while the yeast is still active.
A Note on Cross-Contamination
Lactobacillus cross-contamination is nothing to fear. Lactobacillus is a relatively weak contaminant, far less so than a hefeweizen strain, most Belgian strains, and significantly less risky than Brettanomyces. Do not fear! You don’t need a bunch of new rubber parts, hosing, and separate fermentors. Simply continue to practice your good brewing sanitation and you will be fine. Do not let the fear mongering of inferior brewers scare you into spending a bunch of money or limit you from trying pre-boil sour techniques. If you really want to take it a step further, use heat to sterilize everything. Boil rubber parts, fill your fermentor with hot (>145°F or 63°C) water, and let Pasteurization do its thing. Just be careful, hot water burns are no joke.
Fruit For Thought
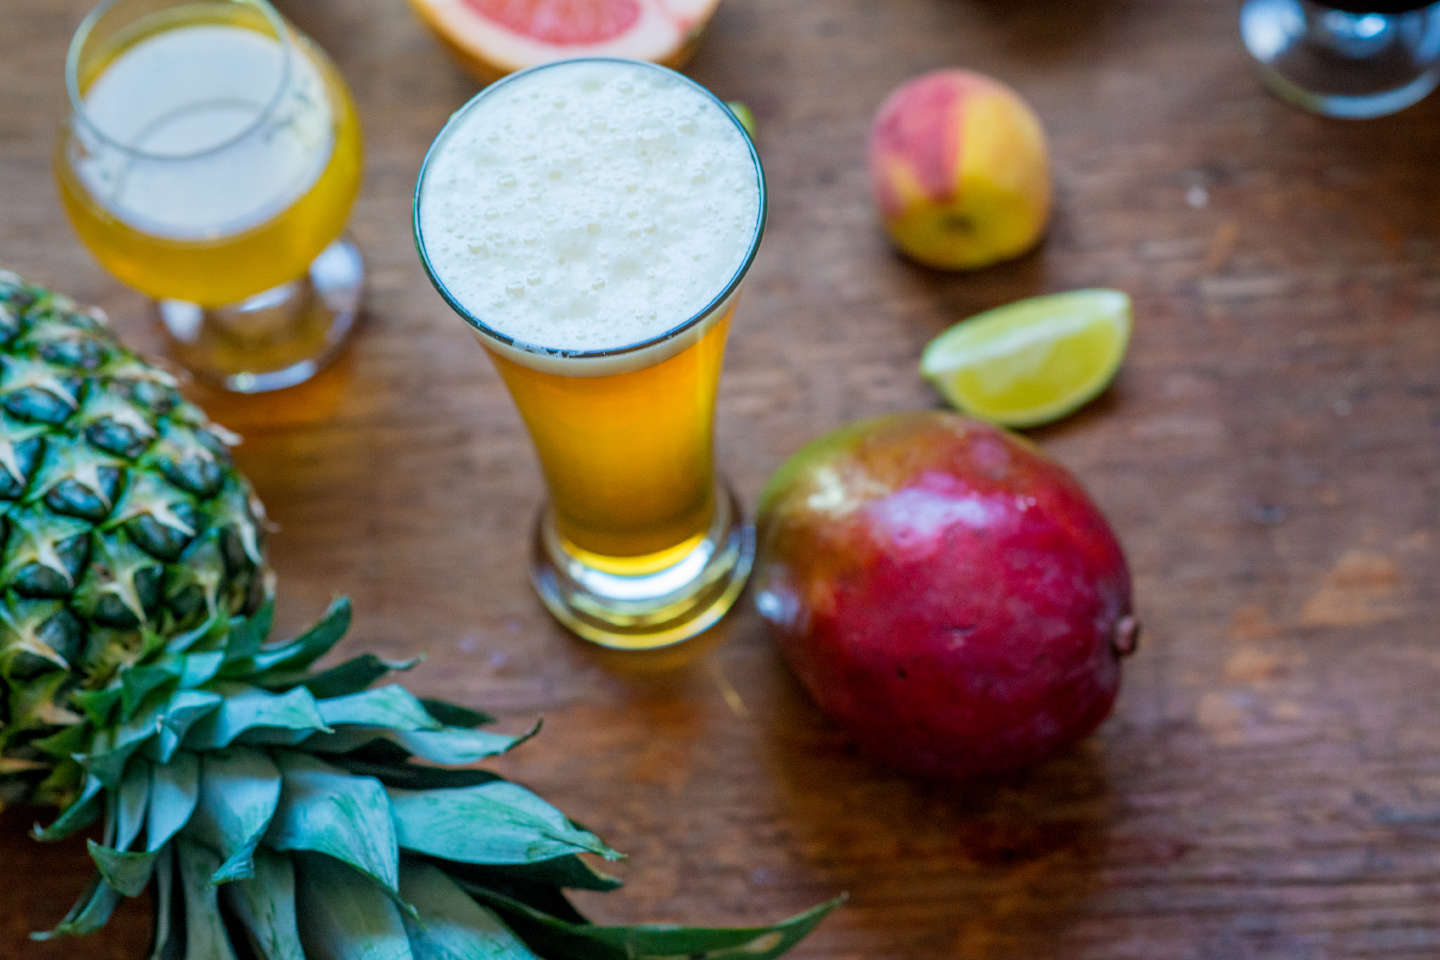
Fruit! This is what this style is all about: a celebration of all things deliciously fruity. I highly recommend only using whole fruit or 100% fruit purees for this style. Concentrates, juices, flavorings and extracts will not have the depth of flavor that is found in fruit that contains all that pulp and skin matter. It will be harder to work with, it will cost a bit more, but it will taste better. Here are my tips when deciding what fruit to use, and how best to use it.
- Whole fruit contains seeds and can be very difficult to work with. I prefer to use whole fruit puree that is de-seeded. If you are using whole fruit, buy it frozen. Frozen fruit is often riper than fresh fruit and will give you a better flavor when fermented.
- Fruit dilutes the beer! When using as much as 3lbs/gal of fruit (almost 30% of the volume!) you’re going to see some serious levels of dilution. This dilution needs to be accounted for and is the main reason you will need to chaptalize the beer & fruit with sugar. Fruit is mostly water, and most fruits are about 1.040 SG. A good rule of thumb is that 9 lb (4.08 kg) of fruit will dilute the beer by 1 gallon (3.8 L). You can use that math to estimate how much sugar to add.
- If making a 5-gallon batch (19 L), 15 lb (6.8 kg) of fruit will be used. 15 lbs of fruit is 1.6 gallons (6 L). So if your target SG is 1.085 (20.5°P) and you have 1.66 gallons of fruit at 1.040 SG (10°P), you need an extra 0.045 points of gravity (11.25°P) added through either sugar, DME, or extra malt in the mash. I opt for the sugar route, and will then add 1.75 lb (0.79 kg) of sugar. (1 lb of sugar in 1 gallon of water is 1.046 SG).
- The math may seem daunting, but it is far easier if you use a recipe software to do the calculations for you.
- If using purees, make sure to buy a puree that is 100% fruit. Unscrupulous fruit suppliers will add up to 10% sugar and/or flavorings to their fruit puree as a means of cutting costs and cutting corners on the quality.
- You will see a high amount of loss to unfermentable fruit solids, so be prepared for that. Up to 20% loss from fruit trub can be expected.
- Use bentonite or other wine fining agents to help clear the beer and help the fruit compact/settle. Don’t rush the settling process. It may take two weeks post-fermentation.
- Strawberry seeds will create a polyphenol compound that smells like plastic, quite vinyl-like. If using strawberries, buy a seedless puree.
- Blueberries are an extremely mild-tasting fruit once the sugar is fermented out. You can add some more depth to this fruit by first cooking it into a compote. Even if you bought a blueberry puree, toss is on the stovetop, bring to a near boil, and simmer. Add a pinch or two of sugar to help with flavor development.
- Passionfruit is wickedly acidic (citric acid). Don’t use it alone unless you’re a glutton for punishment. I recommend keeping the dosing rate at or below 1lb/gal for an intense passionfruit character or closer to 0.25lb/gal for a more subtle tropical influence.
- Pineapple largely derives is flavor and aroma from its juice. This is the only fruit where using the juice will give a similar, if not better, flavor experience than whole fruit.
- Peach, Plum, Mango, and other pulpy fruits will have lower yields than the more juicy fruits like raspberry, blackberry, or cherry. Again, lower yields are to be expected with these fruits.
- Peach, Nectarine, and Blueberry are delicate fruits and require either higher usage rates or the expectation that they won’t be as loud as say, raspberry or pink guava.
- Think about the flavor of the fruit when you eat it. How delicate is the aroma and where does the flavor come from? Is the flavor mostly sugar, like apples and pears? If so, you’re not going to get a strong flavor in the beer once those sugars are fermented out. This is part of the fun, just be prepared for the difference!
- The finishing flavor of fruit in the final beer will come down to tannic and acidic impact. A passionfruit is very acidic, but not tannic (drying). A raspberry is both acidic and tannic. A peach is neither acidic nor tannic. You can use this knowledge to your advantage to balance flavors that would otherwise be flat on the palate or to accentuate like flavors. Raspberry (acidic, tannic) blends wonderfully with fruit that has a similar profile, like a blackberry (acidic, tannic) or with fruits that need a bit more bite (apricot) or tannic balance (pineapple).
- Ultimately it comes down to taste. Think about the flavors of the fruit you’re eating—what it will taste like without sugar, and what will blend well with it? Have fun, experiment, and be prepared to learn!
Breaking It Down and Putting It All Together
Well, there is certainly a lot to digest here. Deep Breath. Exhale. Ok, let’s put this all together in a step-by-step process.
Part 1: Wort Creation
- Mash your malt at 148°F (64°C). Lower is better, as we want maximum starch conversion into simple sugars. There will be plenty of body to this beer already, so everything else we do should be working towards maximizing attenuation.
- If you really want to push it further, mash thick to squeeze out every last bit.
- If you’re messing with water chemistry, aim for a balanced profile. 100ppm Ca, 100pm SO4, 100pm Cl. Once you get a feel for the style, feel free to adjust the water profile for the specific fruits you are using.
- Collect only 4 gallons (15 L) of wort (for a 5-gallon batch). This will give you headspace for all the fruit we are adding. Make sure to calculate your grain needs based off 5 gallons of wort, as we still going to end up with 5 gallons after we add the fruit.
- Bring your wort to approximately 180°F (82°C). This will pasteurize it, giving us as clean a starting slate as possible. Add 1dose of yeast nutrient (I like Fermaid K), supplemented with manganese and zinc if you have it. For total nutrients needed, take the maximum recommended dosage rate, and divide it into 3 parts. Use ⅓ now, ⅓ at boil, and ⅓ at fruiting.
- Chill the wort to 85°F (29°C) and knock out into a fermentor.
- Pitch your pure lactobacillus culture(s) and store in a warm, dark place for at least 48 hours, and up to 72 hours. More time won’t make it too much more acidic, but can open you up to contamination/infection. If you have a pH meter, we aim for approx. 3.4 pH before boiling.
Part 2: Boiling
- Move your now-acidified wort back to your boil kettle and boil.
- Add your hops. Aim for 15–25 IBUs. We use only a first-wort addition. We aren’t looking for hop flavor here, we are simply looking for balance. Base the total IBUs you need on the flavor profile of your fruit. Tropical fruits do well with less bitterness. Berries can handle more, but you can’t really go wrong in this range.
- At the end of boil, add dose 2 of your 3 yeast nutrient portions and another dose of zinc if you have it.
- If using kveik yeast, knock out at 80°F (27°C) into a fermentor. We set the maximum temperature set point to 86°F (30°C) at this point, but if you have no temperature control it’s no problem for this yeast.
Part 3: Fruiting & Packaging
- After approx. 2–3 days once the height of fermentation is just starting to subside, add your fruit, sugar, and third dose of yeast nutrient. At this point, if possible, set your temperature control to a maximum of 96°F (36°C). Letting the kveik free rise at this point will help dry the beer out. Again, no temperature control, no problem.
- Once fermentation is complete and the beer is cleaned up of diacetyl, add your vanilla and clarifying agents.
- Let sit for up to 2 weeks to really compact that trub and lees sediment. Feel free to rack once or twice if need be.
- Crashing during this maturation phase also helps condense the trub.
- Carbonate to a target of 2.8–3.0 vol. CO2.
- Enjoy!
That’s it, you did it! It might seem like a lot to digest but there are basically two key steps here. The first is to make sure you really nail that acidification step. A good, clean sour beer only comes from treating the acidifying step as you would the alcoholic fermentation step, with patient care. Once you have this souring process down, you can use it for any style (or new styles!) you want. Super clean and crisp Sour IPAs (with or without fruit), sour lagers, sour stouts, traditional berliner weisse, gose, sour anything-you-want. Take a portion of soured wort from one beer and use it to add depth to another (this is kind of how a traditional Irish stout such as Guinness was made, but that’s a whole other story).
The second thing is to just love fruit. Understand that fermented fruit does not taste like unfermented fruit. Grapes don’t taste like wine. Fermented strawberries aren’t going to taste like fresh ones. Experiment with those weird fruits you found at the grocery store. Make new combinations that you otherwise can’t get. Put more fruit into other styles. Fruit is a wonderful and diverse fermentation vehicle that is ripe for innovation and learning. Have fun experimenting with the new flavor profiles you’ll create and enjoy a nicely balanced, dry, fruit-forward tart beer!
Midwest Fruit Tart Homebrew Recipes
The Gadget
Ingredients:
- Malts
- 80% 2-row/Pale Malt
- 20% Vienna Malt
- SG target = 1.075 (18.25°P)
- FG Target = 1.012 (3°P)
- Fruit Bill (for 5 gallons)
- 7 lb (3.2 kg) Seedless Red Raspberry Puree
- 7 lb (3.2 kg) Seedless Blackberry Puree
- Approx. 1.5 lb (680 g) sugar
- Microbes
- Voss Kveik (OYL-061 from Omega Yeast Labs)
- Lactobacillus culture of your choice. I recommend OYL-605 or a similar L. plantarum culture/blend.
- Hop Bill
- 25 IBUs, First Wort Addition. CTZ or other bittering hop.
Mash at 148°F (64°C). Acidify at 85°F (29°C) for 48–72 hours, or until a pH of 3.4 is reached. Boil 60 minutes. Pitch kveik and ferment for 2–3 days at 86°F (30°C). Add fruit and sugar and ferment at 96°F (36°C). Ferment for another week. Clarify, crash, and package
Fire Iron
Ingredients:
- Malt Bill
- 100% 2-row/Pale Malt
- SG target = 1.080 (19.25°P)
- FG Target = 1.012 (3°P)
- Fruit Bill (for 5 gallons)
- 8.75 lb (4 kg) pink guava puree
- 2.5 lb (1 kg) passionfruit puree
- 3 lb (1.5 kg) banana puree
- Approx. 1 lb (450 g) sugar
- Microbes
- HotHead Kveik (OYL-057 from Omega Yeast Labs)
- Lactobacillus culture of your choice. I recommend OYL-605 or a similar L. plantarum culture/blend.
- Hop Bill
- 15 IBUs, First Wort Addition CTZ or other bittering hop.
Mash at 148°F (64°C). Acidify at 85°F (29°C) for 48–72 hours, or until a pH of 3.4 is reached. Boil 60 minutes. Pitch kveik and ferment for 2–3 days at 86°F (30°C). Add fruit and sugar and ferment at 96°F (36°C). Ferment for another week. Clarify, crash, and package.
* * *
Bret Kollmann Baker is the COO and Brewmaster at Urban Artifact, the largest sour only brewery in the United States specializing in Fruit Tart Ales. Brewing with over 1,000,000 lbs of fruit per year, Bret has been able to establish himself and Urban Artifact as a preeminent fruit beer producer, pushing the boundaries of what fruit beer is and can be. With degrees in chemical engineering and brewing science, and over a decade of professional experience he has been able to pull from the rich fruit brewing heritage of days past and modernize it in ways that highlight the best of the fruits flavors and terroir. Bret has a passion for sharing his knowledge and spreading the word on fruit beers presenting at the Craft Brewers Conference, National Homebrewers Conference, and the Ohio Craft Brewers conference, as well as working on a passion project around the history and culture of craft beer, Brew Skies.

Share Post