By John Moorhead
After you learn how to grow hops, check out Part 2: How to Harvest, Prepare and Store Hops for more information on perfecting the harvest.
As homebrewers, self-sufficiency has created a unique culture. Now it’s time to take the next step and grow your own hops! You don’t need a green thumb, you’ll save a little money and it’s one more ingredient you’ll have complete control over in your beer.
The Hop
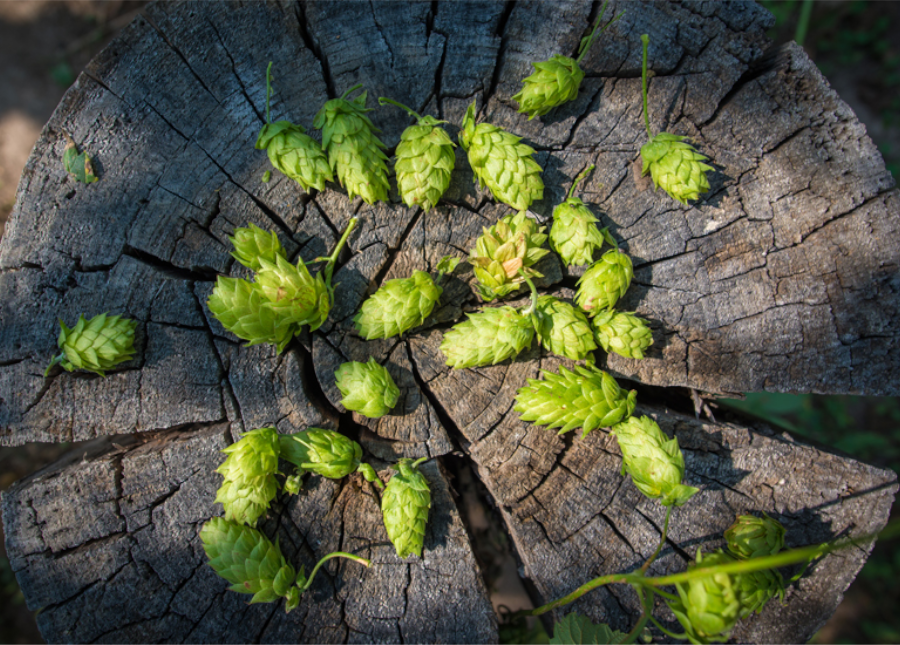
The hop is a dioecious plant, which means they have separate male and female plants. The female plant produces the flowers that are used for brewing, while the male plant pollinates. The female hop (Humulus lupulus) is a hardy, perennial plant that gives beer some of its signature characteristics (bitterness, aroma, flavor, mouthfeel, flavor stabilizer).
Hops also act as an anti-microbial agent, which helps preserve beer and aids with foam retention. Homebrewers can either use rhizomes (small roots cut from the main stem of a female plant) or a crown (an entire hop plant) when growing hops.
A Little Cone With a Big History
Early European settlers began brewing their beers with wild hops from New England. In 1628, rhizomes were brought over from Europe and interbreeding soon created the wild tasting American Cluster variety.
As settlers moved westward, they brought their rhizomes. Wisconsin and Michigan saw brief periods of production, but the western states of California, Oregon and Washington soon dominated the market.
Today, Washington’s Yakima Valley leads the way in hop production, followed by Oregon and Idaho. However, homebrewers grow hops in all states. With careful planning, you could supply your whole hop bill for the year!
Where to Start?
Prior to planting, you’ll need to prepare your soil. Hops thrive in a loamy, well-draining soil with a pH between 6.0 and 7.5. The pH level directly affects the nutrients that are available to a plant. If the pH isn’t right, it can lock up the soil and inhibit growth. You can add sand to the soil to improve drainage and try deep irrigation to reduce saltiness. Try to aim for a slightly acidic soil (6.7-6.9 pH)
With more than 120 varieties of hops currently available, you’ll need to decide which variety to plant. Ask yourself these questions: What varieties do I like to brew with? What varieties will grow best in my location? Where do I get rhizomes? What sort of yield do I want?
Some quick research (the USDA provides great info) will help you narrow down which varieties will work best for you.
Once you’ve chosen your desired varieties, many breweries, homebrew shops and nurseries have rhizomes to purchase. Try to source them locally if possible in order to have a better understanding on the plant’s history, performance and known diseases. Store slightly moistened rhizomes in a plastic bag in the refrigerator until you are ready to plant.
 Location. Location. Location.
Location is key. Hops grow best between the 35th and 55th parallels. Locations outside of this range don’t receive as much daylight for the growing stages—but don’t be discouraged if you fall outside of this range. You can still grow hops in the outlying regions of the United States.
Certain hop varieties perform well at particular climates. Chinook, for instance, grows well in dry, hot climates while Golding hops grow well in mild, moist climates. Do a background check on the varieties you choose to grow. The USDA is a good place to start.
If You Build It, They Will Grow
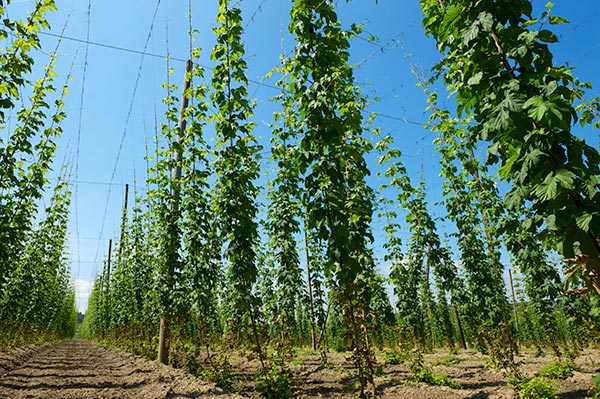
Since hop plants can live 25-50 years, planning their grow space is crucial. They’ll need plenty of climbing space in a sunny location (south facing is ideal), with well-draining soil.
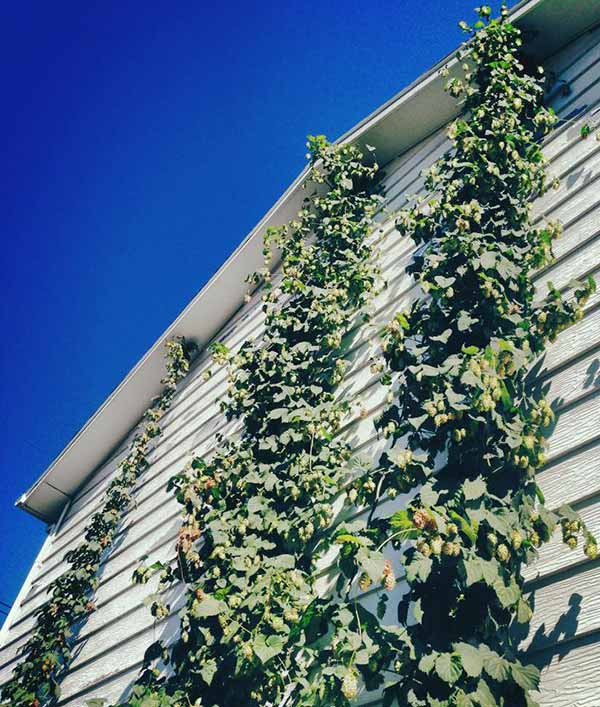
To prevent scorching, try to find a place that provides some shade during the hotter hours of the afternoon. Hops climb clockwise up a support system by using tiny hairs. To support the hop bines, you’ll need to use string (e.g. hemp, wire, fencing and netting) that will allow the hop to shoot upwards. Many homebrewers run string down from the roof of their house, build a homemade trellis or build a metal or wood framework for the hops to climb on.
For the horizontal approach, run the bine up eight to 10 feet then take it horizontally along another twine or support for eight to 10 more feet. You can use this hop canopy as a shade-producing element for a beer garden—a nice place to enjoy a homebrew and view your hops! Make sure to carefully monitor the bines from reaching over to other plants.
Planting months vary from region to region. Do a little research as to what time is best for where you live (e.g. February in California, April in Colorado).
Hops and Soil
You can purchase a pH testing kit from your local gardening store. If your soil pH is low, use a form of lime or wood ashes to reduce acidity. Likewise, if your soil pH is high, you can use aluminum sulfate and sulfur (found at your local gardening store or nursery) to reduce alkalinity. Follow the manufacturer’s instructions when manipulating pH to ensure the appropriate amounts and methods are used.
Dig a one-foot deep hole and add a shovelful of compost, which makes the soil nutrients more available to the roots, then add two to three handfuls of mycorrhizal inoculum, a symbiosis of fungi and plant roots that aids in nutrient uptake and root growth of the plant.
Plant three to six rhizomes two inches below the soil surface so the shoots point upward. When putting the rhizomes in the soil, make sure each area of rhizome varieties is three to five feet apart to avoid root mixing. After putting the rhizomes in the ground with your remaining dirt, put another inch of compost over top and then two inches of mulch, which will prevent weed growth and protect young plants from any late frost.
Hops will absorb additional nutrients of carbon, hydrogen and oxygen through the air. Other helpful nutrients you can purchase are nitrogen, phosphorus and potassium (generally referred to as N-P-K). A common rate is five pounds of fertilizer per 100 square feet (one handful per plant).
Fertilizer schedules vary, but in general you should fertilize on the first sprout, then three weeks later, then once in mid-summer and once at the beginning stages of flowering.
Review the stages of growth and other pertinent information found in Stan Hieronymus’ book “For The Love of Hops” before planting: dormancy, spring regrowth, vegetative growth, reproductive growth, formation of cones and preparation for dormancy. Properly identifying these stages will help you better understand the plant and determine what needs to be done to ensure ideal yield come harvest time.
Sleep. Creep. Leap.
As the saying goes, first they sleep, then they creep and last they leap. The first year’s growth likely will not yield many cones and is mostly devoted to establishing the crown and root system. As the years progresses, your hop plants will mature into mean, green cone-growing machines.
Mature plants over three years old require root pruning in early spring. Without it, rhizomes will spread throughout the year, hoarding nutrients and water from the crown needed by the shoots. In the first year of growth, let the plant grow without any pruning. In the following years, as the bines begin to grow, you can prune the first spring shoots to encourage more robust secondary shoot growth. Once these shoots are one to two feet tall, pick two or three shoots to train clockwise from the top. It’s tempting to keep all bines on your plant, but choosing a few will give you a more robust plant and better yield.
Once you’ve picked your two or three shoots, begin training them to climb. Don’t disturb them on a cloudy or cool day because they are brittle and may snap. If it does snap, don’t panic, the next node down will grow. As the season continues, continuing training your hops by trimming back the untrained shoots to ground level and mulching to keep the weeds down.
After the hop burrs (the beginning stage of flowering that shows white feelers budding off the tips of the plant) have appeared, you can cut away the lowest four feet of foliage and lateral branches to aid in air circulation and reduce disease development. The removal of the lower leaves must be done carefully to avoid breaking or kinking the main stem. In late summer, allow bottom growth to promote hardiness of the crown and the plant vigor for the following year.
 Hops Are Thirsty
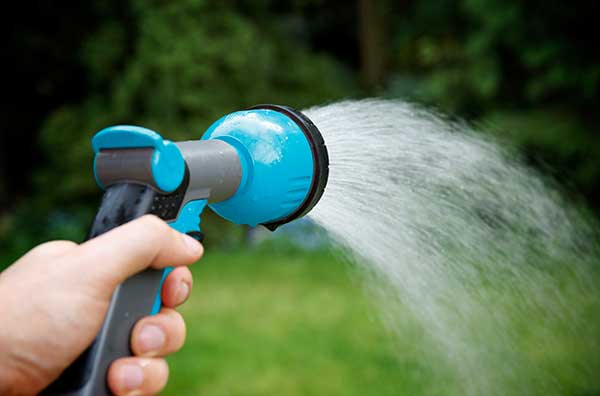
Hops require a lot of water, especially in their first year. The older the plant, the less frequent the watering. In areas where irrigation is necessary, never apply overhead water such as a sprinkler system. This will create a moist environment that is disease prone. A drip irrigation system is the most water-efficient method.
Consider building this cheap drip irrigation system to keep your hops thirst quenched.
It’s A Picking Party
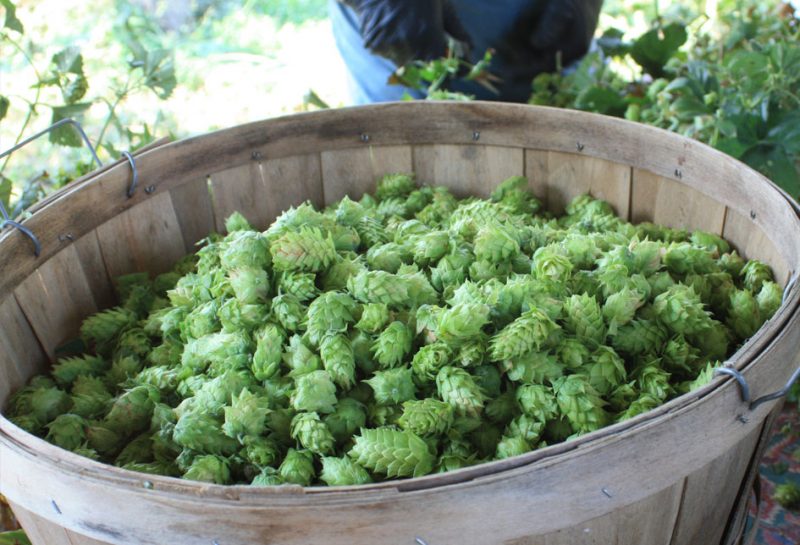
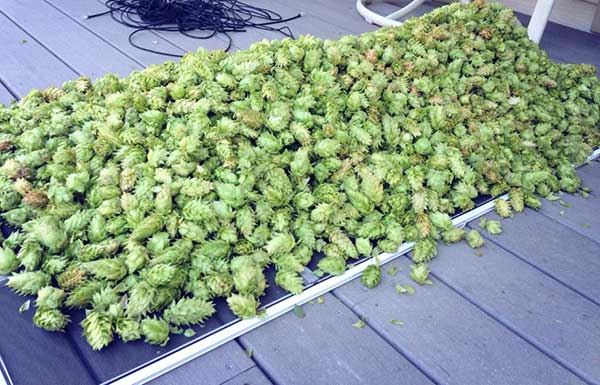
You’ve planned, pruned, monitored and cared for your hops all summer and now those little cones have arrived! Be patient. A common mistake is picking the cones too early. You want to pick over-ripe hops rather than under-ripe hops.
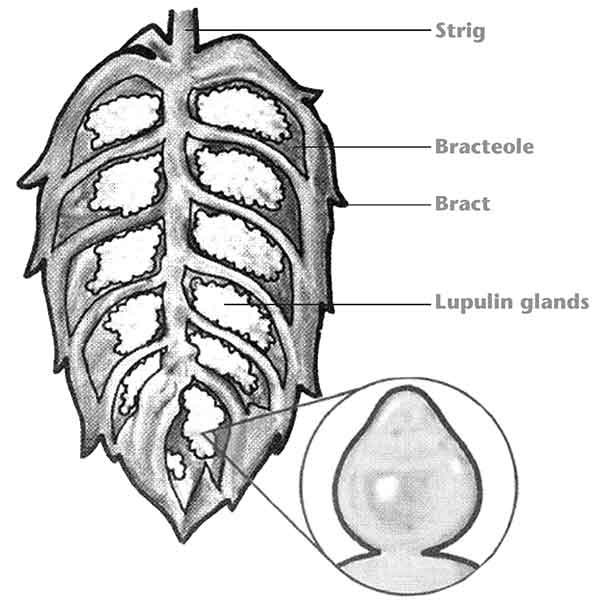
Depending on your location, harvest occurs mid-August through September with aromatic varieties maturing first. As resins and oils develop, the cone will send water and nutrients from the bracts into the lupulin glands, leaving the cone slightly dull and papery. Look for the tips to become a little dry on the cone before picking and wear a long sleeve shirt!
There are a few methods to check ripeness of your hops.
- Give the cones a light squeeze occasionally and when they feel light and dry, and spring back after a squeeze, they’re ready.
- Pick a cone, roll it in your hands and smell it. If it has a pungent smell between cut grass and onion, it’s time to harvest.
- Roll the hop next to your ear. If it makes a cricket sound, this also means they’re ready to harvest. If the lupulin turns orange and smells rancid, you’ve overshot your window.
For first year bines, try to pick the cones and not cut down the bine until it dies off. This will lend necessary nutrients back to the roots for the winter. For following years, cut the bine down and be careful not to damage or dirty those precious lupulin glands. You should expect one to two pounds of dried hops per mature plant. Now, invite some friends over to help you pick the hops while enjoying some homebrew!
Drying
Wait! You’re not finished yet. Freshly-picked hops can either go directly into the kettle for a fresh hop brew or onto a drying process. There are three factors you’ll want to remember when drying hops: time, heat and moisture.
To prevent oxidation and isomerization, drying shouldn’t last more than three days. You can speed up drying by putting them in the oven, watching closely by checking on them every 20 minutes. The heat you use should never exceed 140° F.
You can also use a drying screen to dry your hops. Place landscape fabric over the top to keep them in the dark and occasionally fluff the hops so moist inner cones are brought to the outside of the pile. Use a fan to expedite the process.
The hops need a moisture content of eight to 10 percent by weight to prevent molding. A quick method to see if they’re dry enough is if the central stem of the cone is almost brittle enough to snap in half. Once the hops are dried, vacuum seal a bag and properly store them in the freezer.
Bitterness Calculation
The old standard to estimate alpha-acid percentage is to make an educated guess and then modify the guess after you brew a few times. Homegrown hops are fresher than those you’d buy in a store, and can have an estimated 50 percent higher alpha acid percentage than the average commercial hop.
One method you can use, described by Patrick D’Luzansky in his article “In the Back Yard” from the 1997 Special Issue Zymurgy, is to compare a same-cultivar hop of known alpha content with your unknown alpha hop. You compare the ratio of quantities of sugar needed to overcome the bitterness and infer that this ratio will equal the ratio of alphas.
For example, if it takes five teaspoons of sugar to offset the bitterness of homegrown hops and three teaspoons of sugar to offset commercial hops, then the homegrown hops are five-thirds as strong, and our alpha-acid content is five-thirds the commercial alpha. So a commercial alpha of three percent would make the homegrown alpha five-thirds times three, or five percent.
Common Diseases & Pests
- Downy Mildew: first spotted in Japan in 1905 and soon followed in America and Europe. It’s caused by the fungus Pseudoperonospora humuli. It will first appear in the spring as infected shoots emerge. Infected shoots will look stunted, brittle and lighter in color and are unable to climb. Flowers often become infected when blooming occurs during wet weather and young cones stop growing and turn brown. Roots and crowns may be completely rotted and destroyed. Remedy: Remove and burn infected tissues, sulfur-based fungicides.
- Powdery Mildew: caused by the fungus Podosphaera macularis and is a major problem in the Pacific Northwest. First appears as powdery white colonies on leaves, buds, stems and cones. Infected cones become reddish-brown as tissues die. Under cloudy, humid conditions the fungus can complete its life cycle in as little as five days. Remedy: Remove and burn infected tissues, sulfur-based fungicides.
- Verticillium Wilt: caused by two related fungi, and the nonlethal strain is more common in the Pacific Northwest. The lethal strains cause rapid death of leaves, side arms and the plant itself. Symptoms on the nonlethal variety include yellow veining of the leaves and wilting of leaves and vines. Remedy: Remove and burn infected tissues, sulfur-based fungicides.
- Hop Stunt Viroid: sub-viral pathogen does just what its name imples: stunts the growth of the plants and can reduce alpha acid yield by as much as 60 to 80 percent per acre. Symptoms of infection may not appear for three to five growing seasons, which increase the danger of the propagation and distribution of infected plants. It is viewed as an increasing threat.
- Hop Aphid (Phorodon Humuli): the hop aphid causes the most damage by feeding on developing cones, which turn brown. It secretes large amounts of sugary honeydew that causes a sooty mold fungi on leaves and cones, reducing productivity. It may also transmit plant viruses. Remedy: Lady bugs or insecticidal soaps.
- Spider Mites (Tetranychus Urticae): spider mites also suck plant juices from cells. A minor infestation causes bronze leaves, while a severe one results in defoliation and white webs. Spider mites are most dangerous during warm, dry weather and no usually a problem for well watered plants. Remedy: Phytoseiulus persimilis (predatory mite) or insecticidal soaps.
Preventative measures and constant monitoring will help prevent any devastating outbreak. The idea is to be proactive by creating an environment that doesn’t favor disease or pests. If things become out of hand, consult your local nursery for more drastic measures.
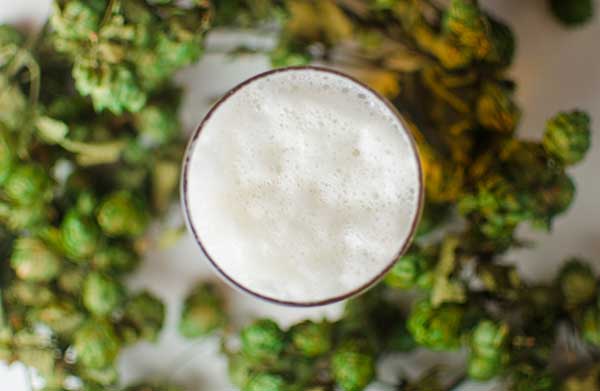
Relax, Don’t Worry, Have a Homebrew
After all your hard work, you can finally sit back and relax with a fresh, homegrown-hopped homebrew. Throughout the fall and into the winter, the bines will send nutrients down into the root system. All that’s left to do is to cut back the bines, cover with compost and mulch, and start planning for next year’s crop.
John Moorhead enjoys homebrewing, mountain biking, and Phish.
Sources: “In the Back Yard” by Patrick D’Luzansky (1997 Special Issue Zymurgy); Matt Gouwens, Brewmaster/Chief Executive Hopster, Hop Farm Brewing Company; “Give Your Homebrew Terroir: Grow Your Own Hops” by Ali Hamm (2009 March/April Zymurgy); Geoff Hess, Farmer and Chain Sales Manager, Oskar Blues Brewery; For The Love Of Hops by Stan Hieronymus; Patrick Weakland, Co-owner, High Hops Brewery
Share Post